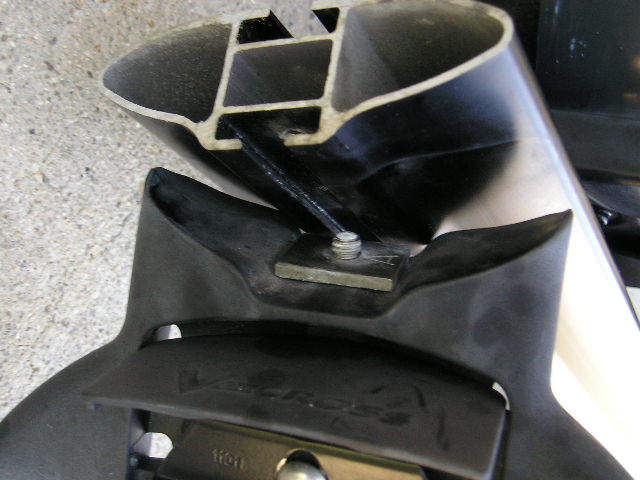
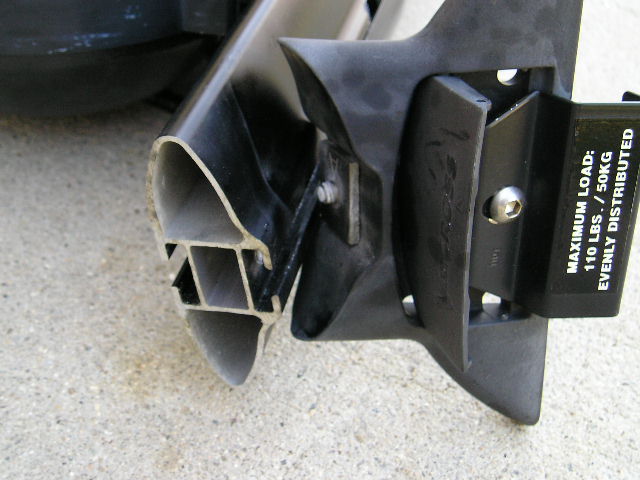
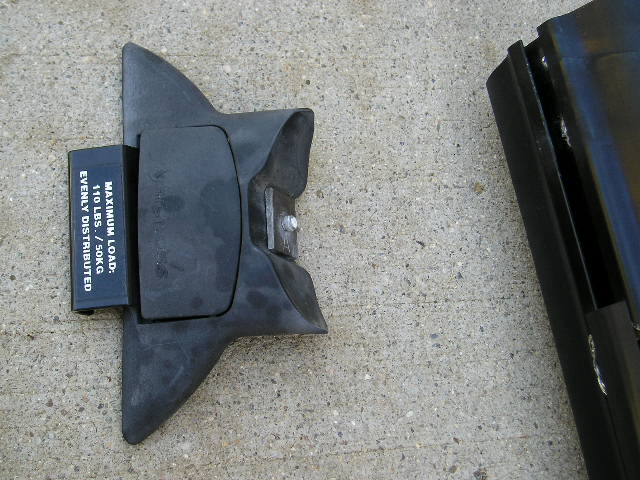
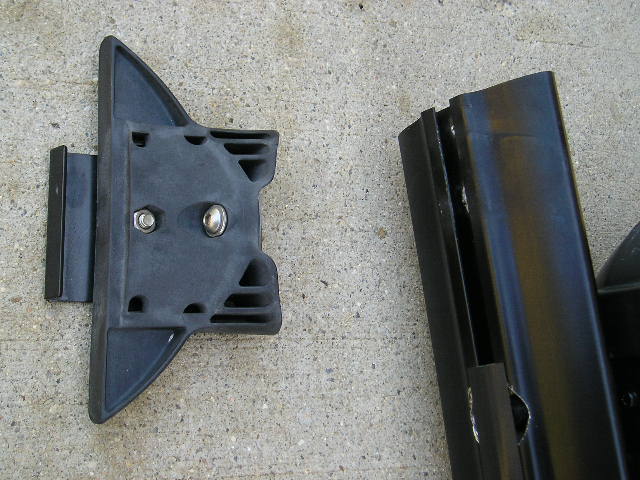
I saw his diagram, I was having error messages whenever I was trying to load a relevent picture.
It was probably my connection. I'll try again tonight.
I saw his diagram, I was having error messages whenever I was trying to load a relevent picture.
It was probably my connection. I'll try again tonight.
Last edited by WyldWeasel : 06/21/2006 at 05:52 PM Reason: added pix
VX: What your Murano dreams it could be...
Those are far better than my pics.
Mine were in the gallery for my $3 ski rack mod.
these pics (and the manual) are FANTASTIC. appreciate the info and effort. and now to further complicate things, i've remembered that a buddy of mine swapped the hex bolts that secure the wing racks to the roofline with security hex bolts (the ones with the small "pin" that protrudes from the center of the hex hole). naturally, i can't locate the security key he gave me when he did that, so i am hoping against hope that i can re-attach the wing rack without removing it from the roof. the part pictured as "A" is what i need to replace, as i have a feeling that's what came loose. most-likely it's floating around inside the wing rack. now if i could just shake the VX a bit, and get it to gently fall out into my hand... otherwise, i need to find a suitable replacement part for that hardware. anyone got any winning ideas?
Those "security bolts" are pretty standard. Is it a hex or a Torx? Either way, you can find "security bolt kits" (Google it) that you can use to open them up.
If you simply want to find that "A" plate, try using a magnet. The crossbar is aluminum, the plate should be steel. Maybe you can "grab" the plate and slide it down to where you can get your hands on it.
so, dismounted the roof rack (once i located my stashed security pin hex wrench) and removed the rubber endcap of the wingrack. i tilted the open end of the wingrack, and lo and behold, part "A" — the threaded plate nut — slid right out into my hands. brilliant. here's the new wrinkle: the machine bolt securing the wingrack to its footing had not — in fact — worked it's way loose, but instead had sheered off completely. nice. next step, removing that, and getting a machine bolt the right size and length to match part "A." my brainstorm was to remove one of the other assemblies, so i could bring that to the shop in pursuit of a match. i have to give some props here, and say that the mounting assembly is really straightforward, even if they did use some slightly "specialized" hardware (specifically, the threaded plate nut).
6x20mm machine nut, 3/4" long. natch, they didn't have stainless, but i figure metal will work fine (not to mention the red locktite). so, it's up, it's on, and it's tight. thanks to all who helped.