


Intro:
A body lift is used to raise up the body from the frame to add tire clearance without adjusting the suspension. A body lift is helpful for fitting larger tires but will not increase frame/drivetrain clearance for offroad applications. The Vehicross is limited to 4” of suspension lift (without fabrication) due to the restricted downward travel of independent front suspension. Suspension & body lifts can both be installed to help balance out lift, tire clearance & drivetrain stress.
The Vehicross currently has 1” & 3” body lift kits available for purchase through Independent4x. The 1” body lift kit is a simple installation of adding a 1” spacer to the body-frame mounts. The 3” body lift kit requires more modification to hoses, wires, mounts, brake lines, drivetrain linkage & bumpers but essentially is the same process as the 1” body lift. When purchasing a kit from Independent4x, use the “Trooper” model designation to receive the appropriate kit.
Tools:
1.) Jack & jack stands
2.) Wood blocks in different sizes (2x4, 4x4)
3.) Metric socket & wrench set
4.) Penetrating oil
5.) Welder (optional)
6.) Jig Saw or something to trim cladding
7.) Metal cutting tool
8.) Impact wrench (optional)
*Installing a 3" body lift should take between 6-10 hrs.
Procedure for installing the 3” body lift kit on a Vehicross:
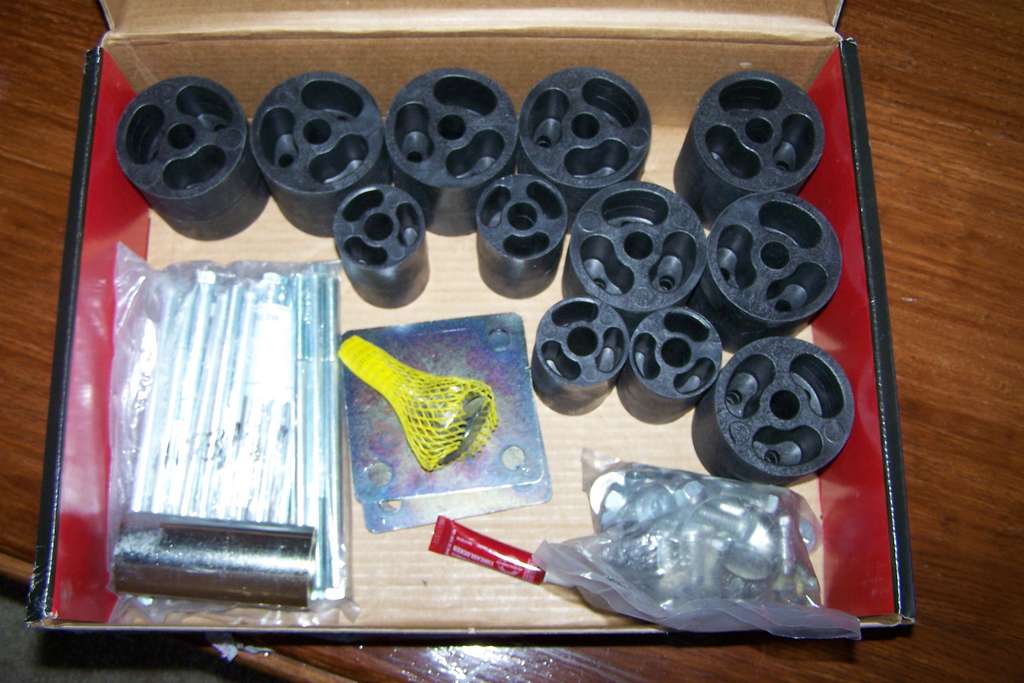
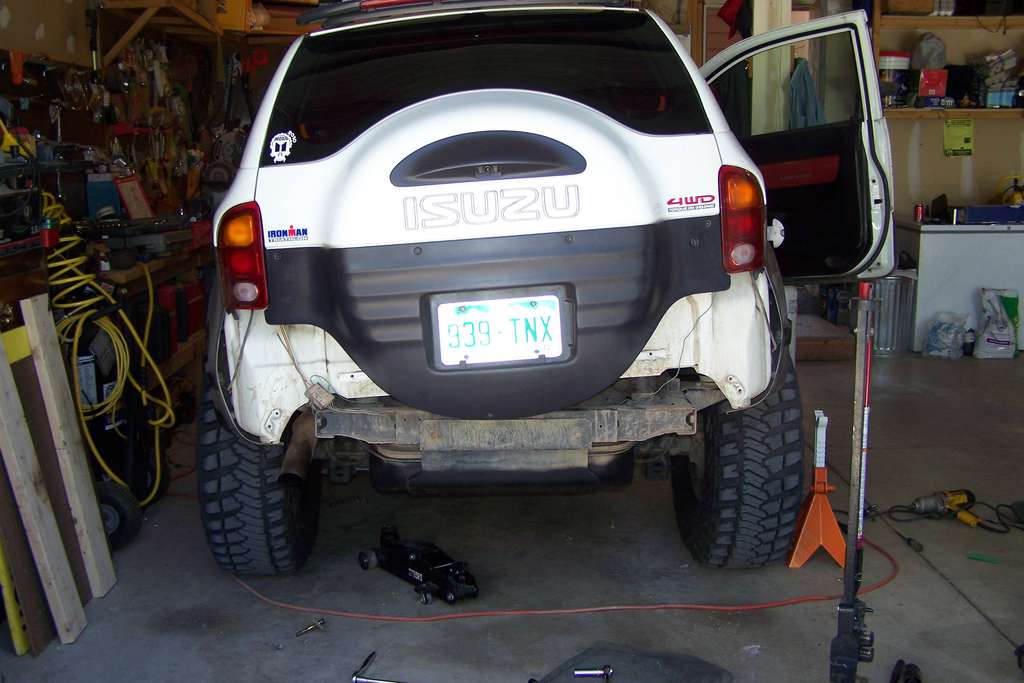
1.) Open the box, it should look something like this:
2.) Prior to installing, spray the body mounts bolts with penetrating oil to help break up rust build up
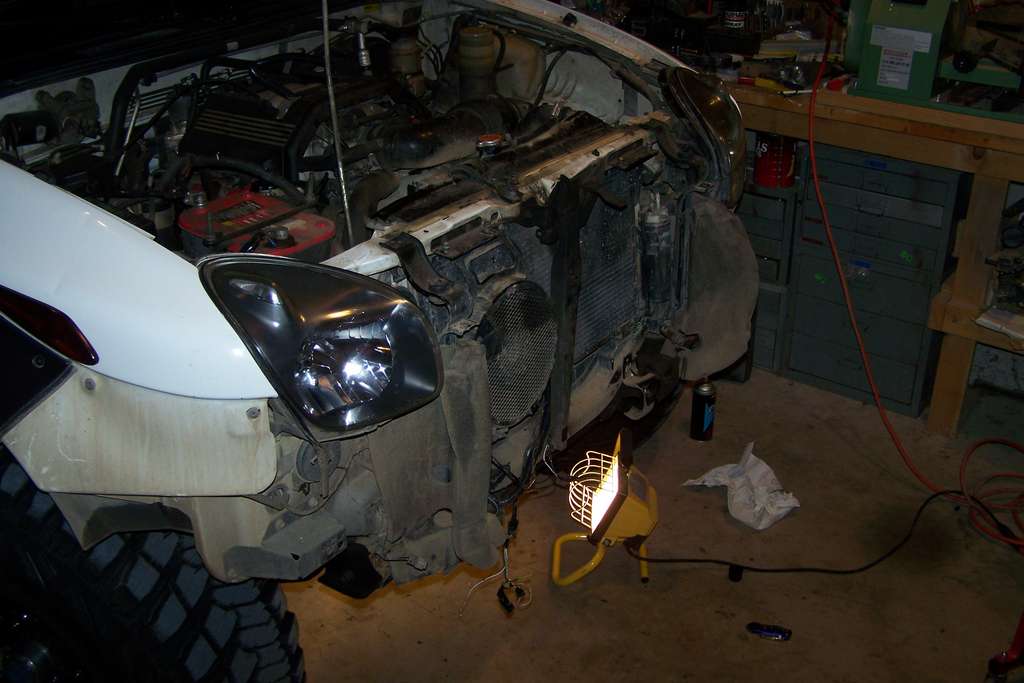
3.) Remove the front & rear cladding bumpers. Note: the rear bumper will wrap around under the quarter panel cladding which may have to be removed to release the tabs
4.) Remove the front & rear internal metal bumpers as they will attach the frame to the body
5.) Chalk the wheels, apply the hand brake, place the transfer case in neutral, & disconnect the battery terminals
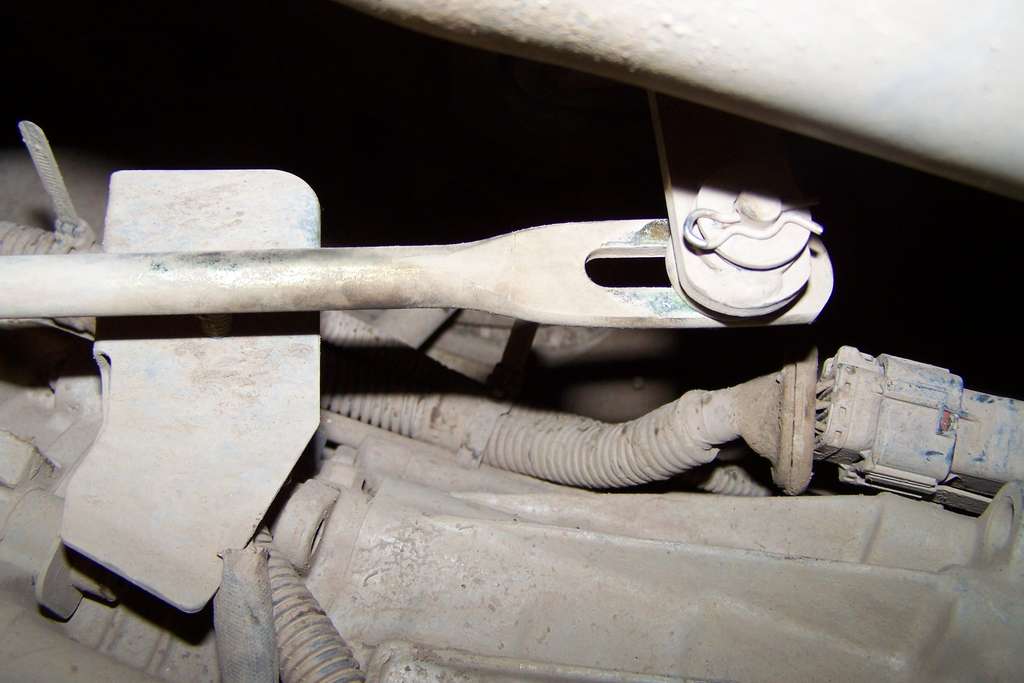
6.) Loosen the 14mm auto trans linkage bolt shown in picture. It is accessible from the driverside above the transmission.
7.) Check all brake line clips & remove/loosen any that may pull a brake line during lift. Note: I only had to remove the 4 clips holding the hand brake lines to the body but your experience may be different so check all brake lines prior to lift.
8.) Remove both circular safety brackets located byside the rear driveshaft on the crossmember
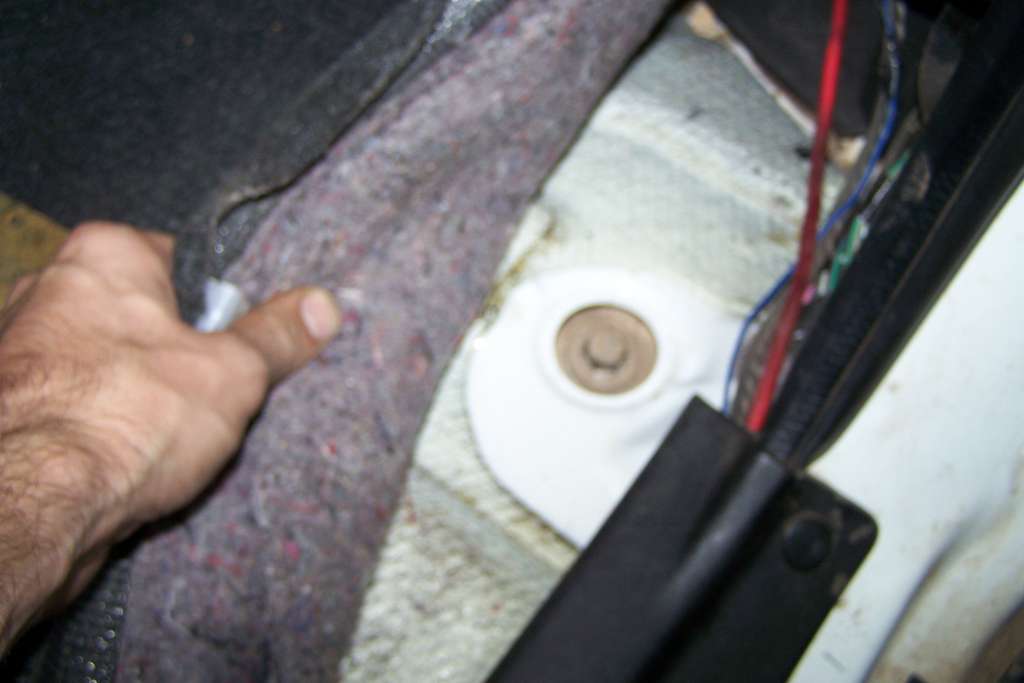
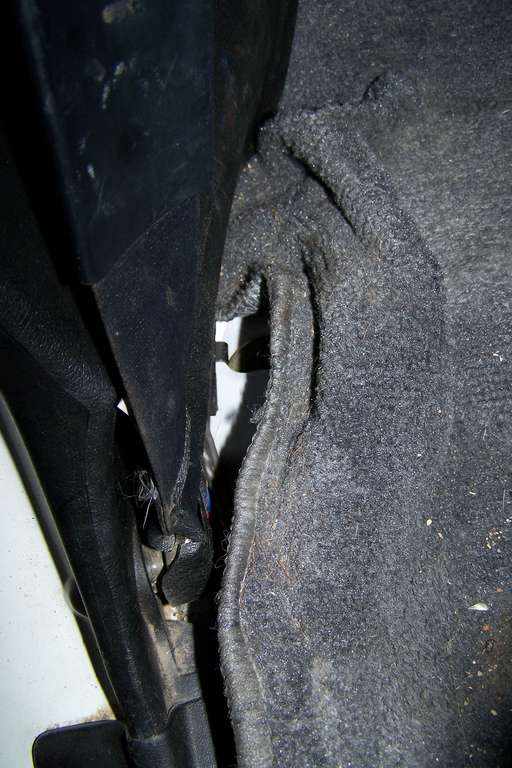
9.) Locate & loosen the 10 body mount bolts but do not remove. For reference there are 2 mounts in the front, 2 behind the front tires, 2 in front of the rear tires, & 4 behind the rear tires. You will need to pull up the carpet to access two of the body mounts (per side) as shown below.
10.) Now you’re ready to lift and you will want to have a helper before starting the next part.
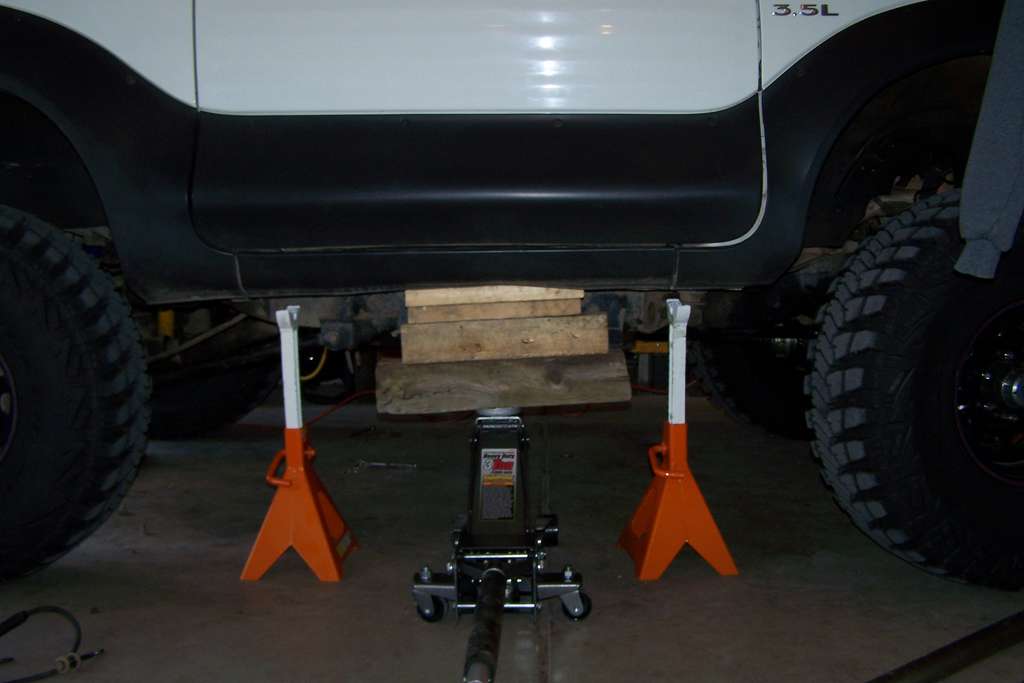
11.) Remove the 5 body mount bolts on the passenger side of the VX. Place a jack with wood blocks under the body between the F&R tires. Note: Be sure not to jack the frame & the cladding, only the underbody. The 4 body mounts behind the rear wheels thread into the frame and the other 6 mounts use a bolt & nut.
12.) Slowly start lifting the vehicle, have your helper keep an eye on the engine bay for hoses and wires
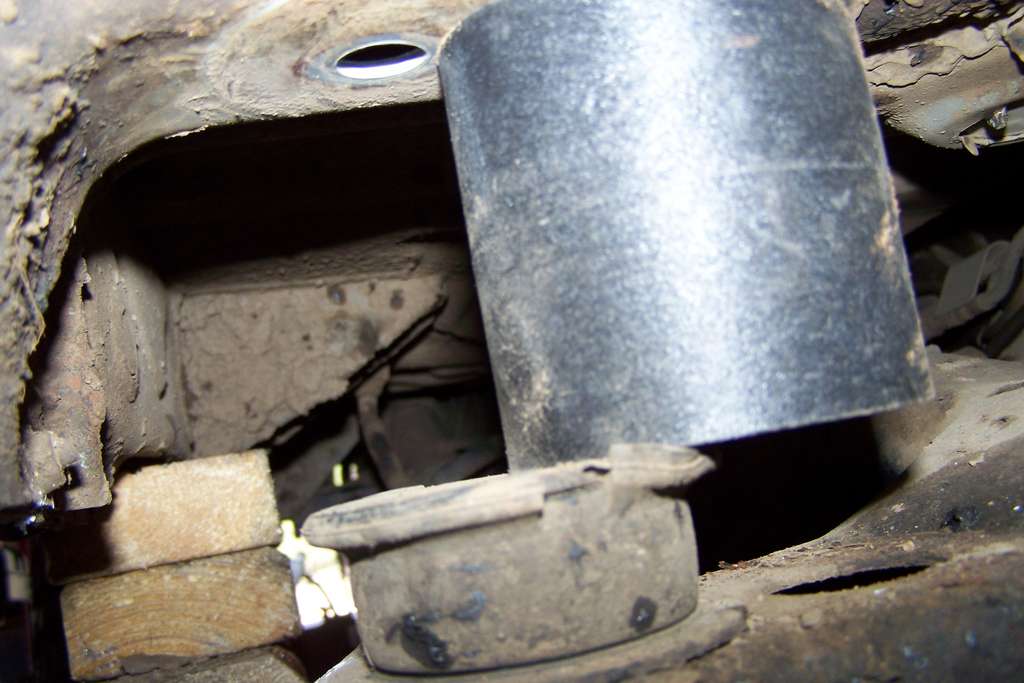
13.) As long as nothing is binding/stretching, continue lifting the VX until there is a 3” gap between the body mount & frame. Now it time to gather the new spacers & bolts. Make sure to split up the bolts appropriately (the 4 rear mounts have a metric thread for the frame).
14.) Place the new spacers in position above the old body mounts and thread the new longer bolts to hold the spacers in place. The narrow spacers are used only in the front. Do not tighten, just secure.
15.) Before you can lift the drivers side of the Vehicross, you need to check a few things for the steering in the engine bay.
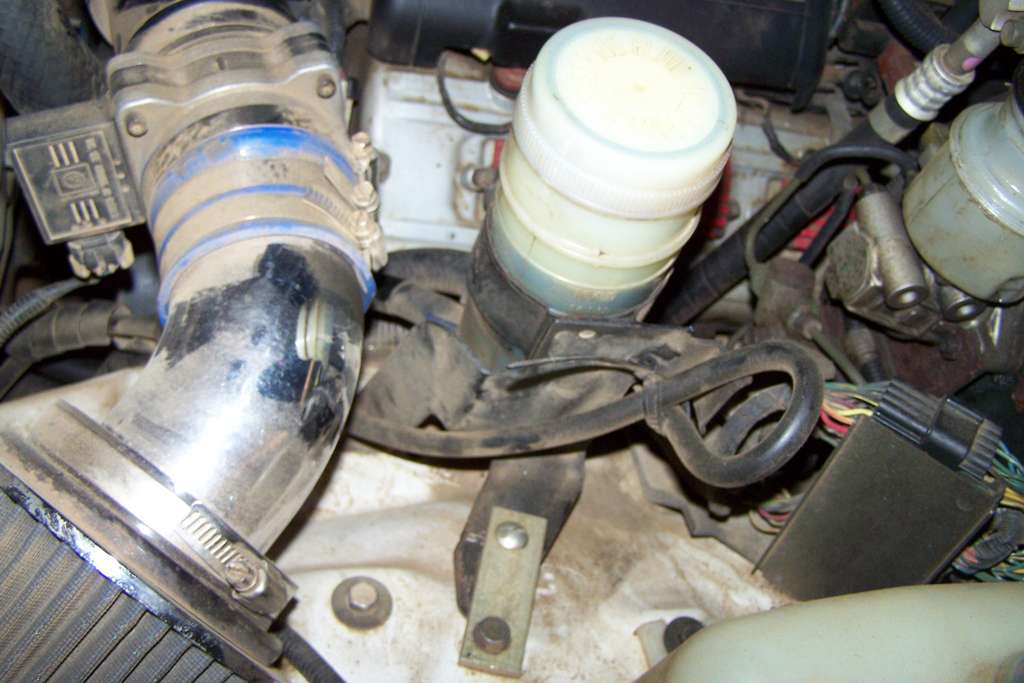
a.) After lifting the passenger side, the power steering lines may be starting to tighten up. I felt that the lines would be a little short once I lifted the driver side so I unbolted the reservoir & bolted it a little lower.
b.) This kit comes with a steering column extender piece that fits onto the splined shaft at the gear box. For whatever reason, you definitely need this piece on a Trooper but I couldn’t get enough room to install the piece. Our VX have a teleoscoping steering colum that just extends after you lift it. Since I’m not sure if your experience will be the same as mine, I would take the time to mark the position of the splined shaft at the gearbox & loosen the fixing bolt. If the steering shaft needs to be extended, it will simply slide away from the gearbox when lifting the driver’s side and you will aready have it marked to keep the steering wheel aligned. Note: I later learned that the gear box needs to be removed in order to install the extender piece. I haven't found a need to use the extender since I haven't had any problems after 500 miles & two offroad trips.
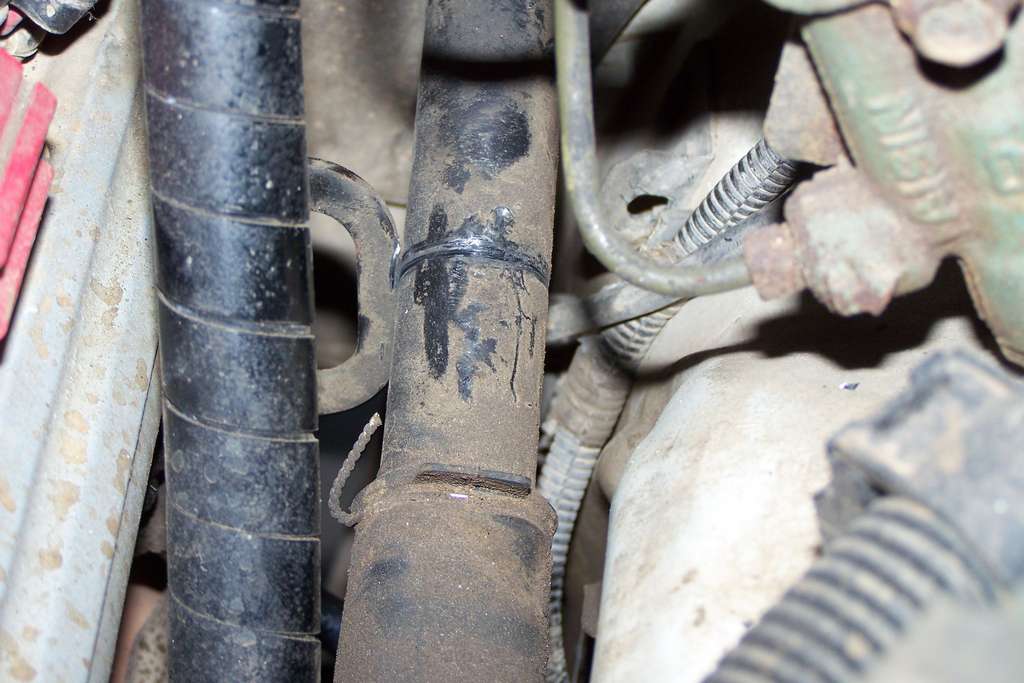
c.) Remove the engine mount located near the steering shaft because it will rub once the lift is installed.
16.) Now you are ready to lift the drivers side of the Vehicross. Repeat steps 13&14.
17.) Check all spacers to make sure they are in place (remember you should have used ten total). Once you have verified everything is in place, tighten all bolts to correct specs & use thread locker where possible.
18.) Take a breath… almost done. Walk around your now higher Vehicross & make sure everything looks nice and level. Now is a good time to recheck the steering shaft & power steering lines mentioned in step 15.
19.) Adjust the auto trans linkage. This may take some time to get it correct as your shift positions will act funny if the linkage is too loose or too tight. I ended up adjusting mine a few times after test drives to get it feeling normal again.
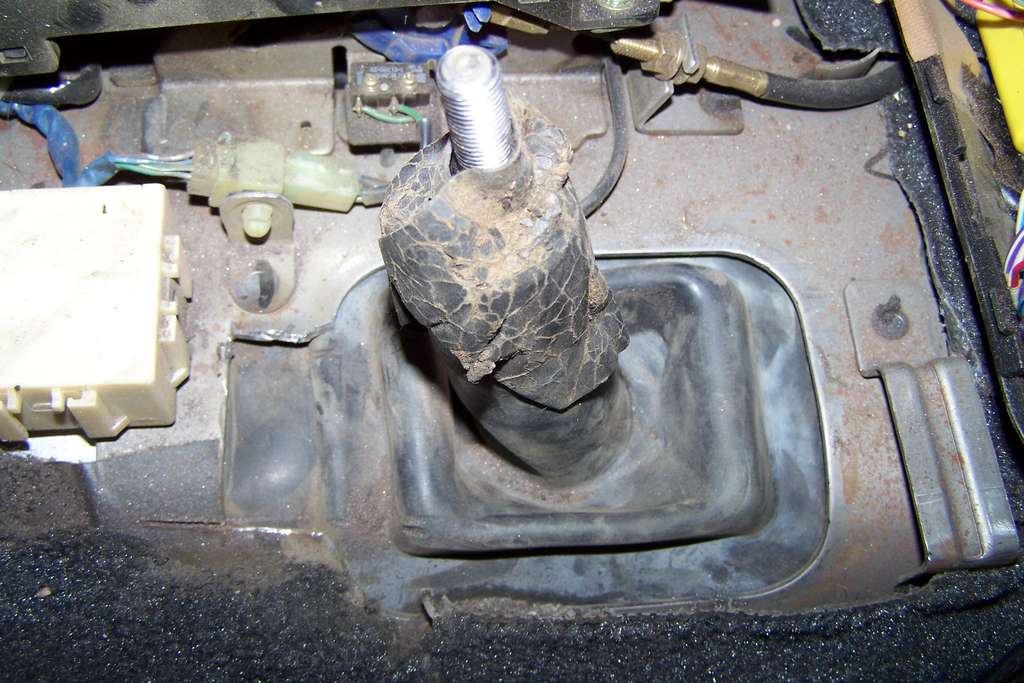
20.) Now we need to adjust the transfer case lever which should still be in neutral. There are two ways to do this & it really depends on if you have a welder available.
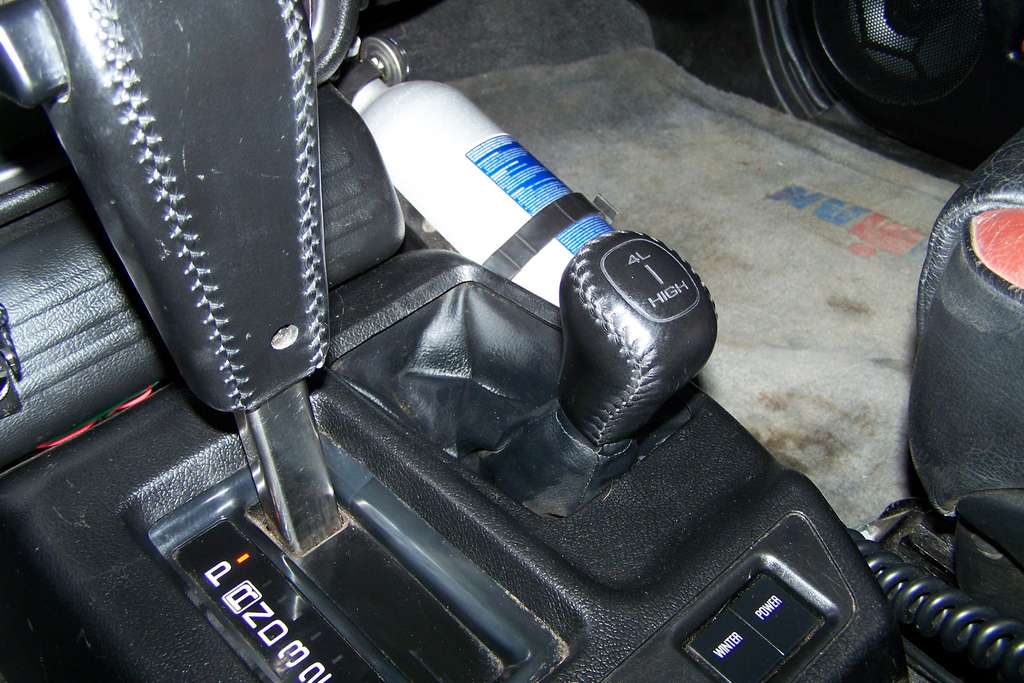
a.) Welder available: remove the center console covering shifters. Remove the transfer case/auto shifter plate from the body. Cut the transfer case shifter above the base and weld in the 3” extention provided in the kit. Reassemble. Disclaimer: I did not extend the shifter this way and it may have different steps than the ones I provided.
b.)No welder: remove the center console covering shifters. Using a dremel or grinder with cutting wheel, carefully cut back a square piece behind the transfer shifter which will allow the shifter enough room to shift into TOD. Reassemble console. Note: your shifter will be STUBBY!!!!! Like it or hate it you can easily extend it later or keep it forever, it wont cause any problems.
21.) Reattach any clips you may have removed for the lift. Check the radiator as it may have moved a bit. Optional: you can use the new radiatior mounts provided in the kit if there is any radiator movment otherwise it shouldn’t need any adjustment.
22.) Check your fuel tank fill line and extend hose if the fill line is taut. My fill hose was fine so I didn’t install an extender. There is an extender in the kit if the fill hose is too tight.
23.) Bumpers need to be reinstalled, the front bumper should go on as normal with possible trimming needed at the bottom lip. The rear bumper will need significant cutting from the lower portion to clear the frame. Take your time and use a smooth cutting tool like a jig saw. The metal internal bumper cannot be installed after body lift which brings up and important safety tip to look into making some kind of new bumper to protect the gas tank during a collision. I will use square tubing (3”x1”) with tow points on the frame & a hitch reciever to protect the gas tank.
24.) Congradulations, You’re Done!!!!! Take your Vehicross for a test drive & enjoy being lifted without the stress to the drivetrain


 Reply With Quote