


Click on the thumbnails for larger pics
The Hella Micro DE
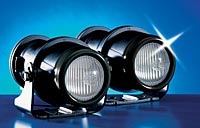
is a very small diameter 50 watt fog light that fits perfectly into the OEM round parking light spot with minimal installation hassle. They come with a full wiring harness and hardware for a basic install. With some inspiration from others, here's how I did my installation.
Take off the front fascia cladding. Not hard to do so I'm not going there.
(Click on the thumbnails to see larger photo)
Following the wiring directions provided by Hella in the kit route your wiring harness along the passenger side from the fuse box through the access hole located under and to the left of the passenger side headlight. (I modified the wiring harness from Hella's original design to accommodate using the factory Isuzu switch. I use the original relay, controlled by my custom ignition switched accessory fuse block's power terminal to control the juice to another relay that is activated when the parking lights are turned on.)
Using "Zip Ties", I routed the leads for the lights along the tube bumper (Short lead for the passenger side, long lead for the driver's side) Make sure to keep the leads on the back side of the tube bumper. That way, if your front end gets bumped, you have a less likely chance of pinching wires.
Tie up the excess of the leads to keep them out of the way and from dangling. I kept the original lead to the round parking lights intact but, tied them back and wrapped them with heavy plastic to keep them as water/weather proof as possible.
You'll notice that the horn was rotated from a 3 o'clock position to 8 o'clock to make room for the length of the fog light. You make have to cut the black tape wrap to give enough wire to make the rotation.
Now, for the install of the lights and hardware.
Here's a shot of the back side of the front fascia cladding.
From the top looking at the turn signal mount.. Isuzu was kind enough to overdo this and make it pretty darn stout.
Using what I call lumber straps, these galvanized steel brackets worked great for fabbing up some mounting brackets. I found them at my local Lowe's home improvement store. You'll need 4 of these, 2 to make one bracket. In 2 of them you'll need to drill 2 holes like the ones shown by the green circles for attachment to the front fascia.
The holes on the sides are asymmetrical so, I couldn't use them. I drilled new ones by clamping the brackets together in this fashion. Then using short machine screws, washers and nuts tied them together. Pay attention to the holes and the alignment (Green Circles) if make yours look exactly like the picture, they are the perfect height.
Mount the fog light bracket to the newly fashioned bracket with the Hella supplied bolt, washer and nut through the larger center hole of the bracket end opposite of the end that has the 2 holes that you drilled (Green Circle).
The 2 brackets should be lined up parallel. The fog light bracket will be facing forward, curved portion to the rear. Slide the fog light bracket forward so the bolt is almost to the very rear of it's slot and tighten snugly. Line the 2 uprights of the fog light bracket up with the back side of the hole in the front fascia cladding. The bolt holes in the uprights should dissect the circle of the "light hole" midway and be centered on the flats (Red Circles).
With this all aligned, mark the 2 holes that need to be drilled through the plastic so you can mount the bracket to the front fascia cladding (Yellow Circle). Notice the 2 tabs sticking out. There are 2 of the same on the other side. I bent mine back into their holes on the front side to get them out of the way.
Now, this is not an exact science. Take a length of 5/16" rubber hose, available at any auto parts store. Measure the inside diameter of the hole for the light front the front side of the fascia cladding, NOT the part with the notches. Take the hose and lay it on a flat surface. With a razor knife cut along the back side of the curve. You'll want to be careful as you are only cutting though 1 wall of the hose. Make this cut as even as possible. It's easy if you use the flat surface as a guide.
Take the cut length of hose and place the slit side over the plastic that has the notches. It's easier if the brackets are not mounted. I ran a bead of weather strip adhesive along the back side of the hole to keep the hose in place(You can see that in the next picture).
Bolt the brackets to the front fascia cladding. I used large diameter washers on the inside of the turn signal housing to relive the strain on the plastic. Snug down everything.
Bolt up the fog light housing to the brackets (Tip: Run the included self tapping screws in the holes of the light housing BEFORE to make the final assembly easier) Note the glue at the top of the hole and the bolts attaching the bracket to the fascia cladding.
Install the H3 lamp capsule (I up graded to 100 watt bulbs) and install the weather boot, making sure to keep the tube pointed down. To keep the wire harness in check I put keepers on the lower back side tab. You can find the keepers at any auto parts store. I bent the other tab down as shown.
However blurry, this is a shot of the large diameter washer I used on the inside of the turn signal housing. I did have to notch out the plastic a little. You could cut the washer if you choose.
Place your front fascia cladding in front of your truck and hook up the leads to the fog lights. Test your lights for proper function before putting the cladding back on. This will save you a lot of trouble.
All is working? Good!
At this time, I suggest you do any other electrical work before putting on the cladding. I modified my front side markers so they blink. (Read more here)
Put your cladding back on making sure not to pinch the wires.
Your lights should look like this.
Here's a few shots of my switches. (Never mind the dust on the dash)
Lights on fog light switch
Pin out diagram on Isuzu fog light switch (8-97125-279-2)
Good Luck!


 Reply With Quote