


This Post has been posted in 4 SECTIONS! (Can only load 20 images max per post and with a maximum of 15,000 characters!)
SECTION 1.
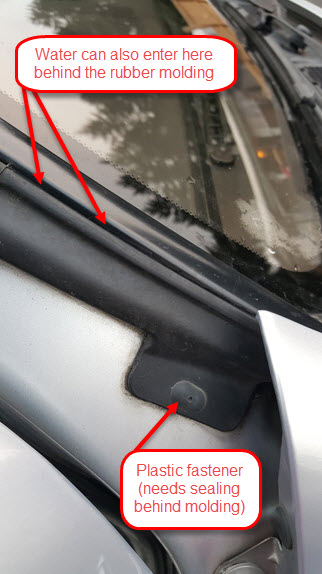
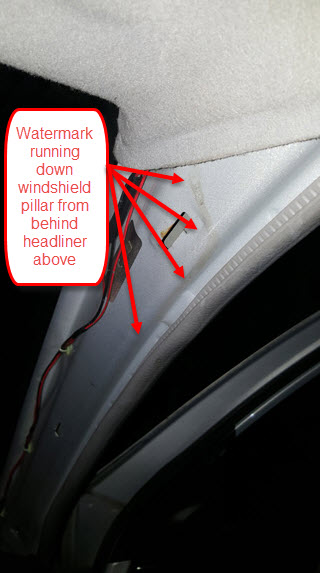
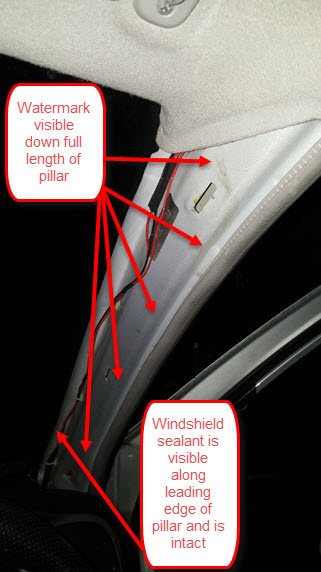
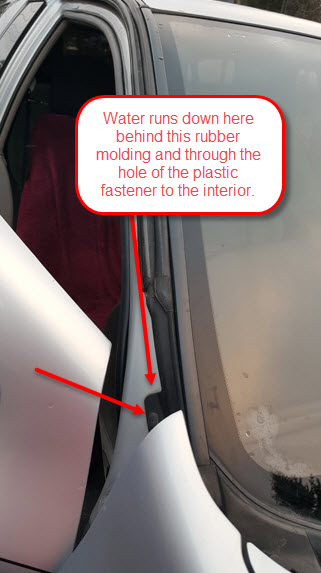
Please check for a complete follow-up post that will deal with the fix for the front windshield outside side trim and moulding and inside trim panel. In the meantime, the photos A and B show where a small amount of water is coming in through the front windshield pillar.
(Photo A)
(Photo B)
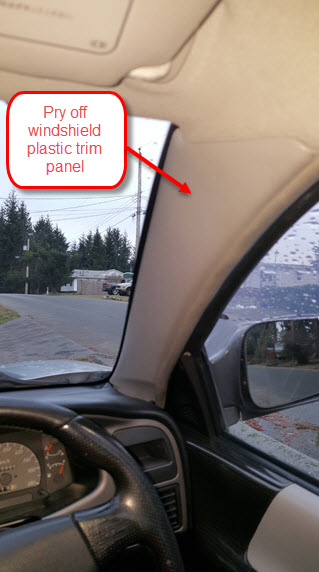
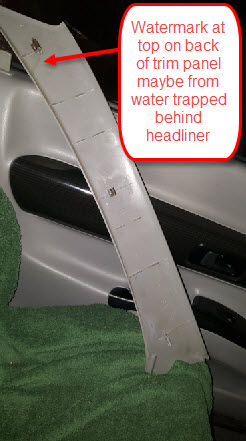
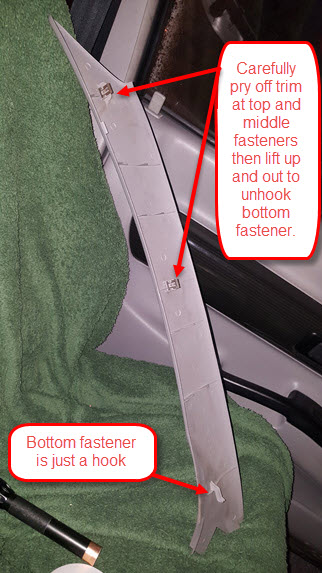
Photos C through G show my early inconclusive findings that suggest a problem with water entering somewhere through the roof, above the head liner! However, before trying the main fix in the body of this post, I recommend you check for moisture behind the interior plastic side trim panel of the front windshield. (See photos C through G) This at least may rule out any possible problem with the roof.
(Photo C)
(Photo D)
(Photo E)
(Photo F)
(Photo G)
Ok, here hopefully will be the definitive answer to the “Wet Carpet Syndrome” ! The solution here applies to both US and JDM manufactured VXs. Since my situation was really bad and involved multiple locations where water was getting in, I am posting the solutions in two, possibly three, manageable parts. I have also taken the position that it is better to seal from the outside rather than letting water sit within a seam which may happen when the seal is made from the inside.
SYMPTOMS
The front carpet becomes damp, to very wet after being parked up for a while when there is moderate to heavy rain. Depending on the degree of camber of the road towards the curb, it is the curb side carpet that is affected. The amount of water that gets in is worse on the driver’s side if that happens to be the side parked against the curb.
When driving in heavy rain or very wet conditions, the carpet on both sides become damp with the driver’s side being more affected.
Secondary symptoms: As you begin to drive the vehicle, the floor pan warms up; the water begins to evaporate and forms condensation on all cold metal surfaces surrounding the foot well and behind the dash, side trim panels. If the moisture is on the driver’s side, the turn signal relay is affected and the turn signal light will either stay on (not flashing) or not come on at all. To rectify this, simply put your heater blower on max to the floor. It takes a couple of minutes to dry out the relay.
THE PROBLEM
PART I.
The problem is exactly the same for both US manufactured and Japanese manufactured vehicles, as in this situation, one is the mirror of the other. All references here are to driver’s side and passenger’s side not left or right. Because all photos are of my JDM VX (right hand drive), I recommend that for owners of left hand drive vehicles, you simply download all the photos and using a simple photo viewer, flip them like a mirror, side to side, this will make it much easier to follow.
In Part I. I have identified three manufacturing faults that compound the problem plus a possible fourth involving the sealant material itself that was used between spot welded seams.
A. The greatest ingress of water is through the rubber grommet in the side cowl immediately forward of the door pillar on the driver’s side through which the hood release cable runs at an acute angle.
(photo 01)
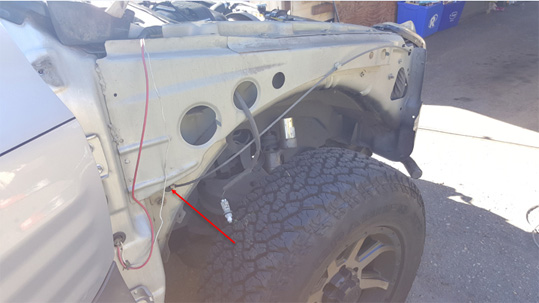
This is not visible until you remove the fender. The manufactures chose to use a flat grommet that is flush to the panel instead of an extended flexible grommet that looks like an elephant’s trunk. Because of the acute angle of the cable, the rubber grommet is stretched open leaving a gap of about 1/8” for water to flow through to the interior behind the dash side trim panel.
(close-up photos 02
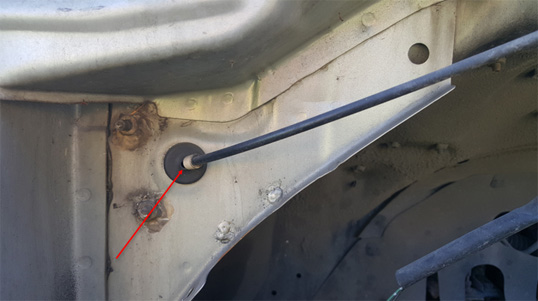
and 03)
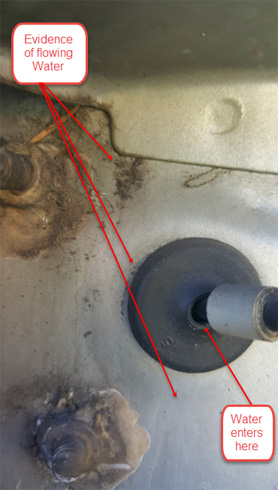
In my case this was the worst point of water ingress leaving my driver’s side floor an inch deep in water after very heavy rain, parked up, with the road camber tilting down towards the driver’s side.
B. The vertical spot welded seam where the side cowl panel attaches to the front door pillar extending down from the bottom corner of the windshield to the base of the pillar, can be divided into three sections
(photos with 3 sections indicated and access hole to middle quarter section: Photo 04);
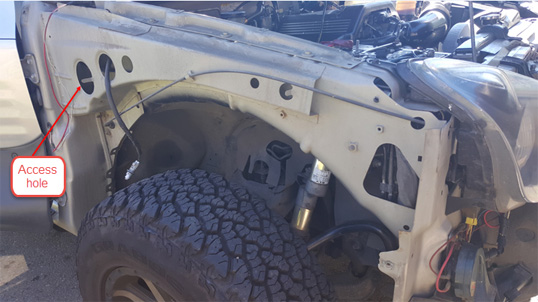
an upper quarter at the bottom corner of the windshield
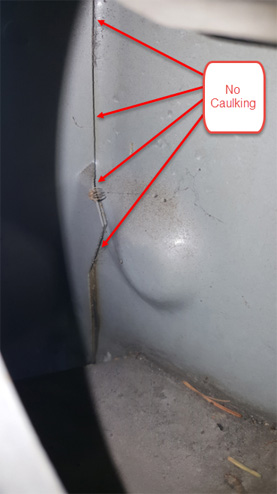
(photo 05 indicate no caulking)
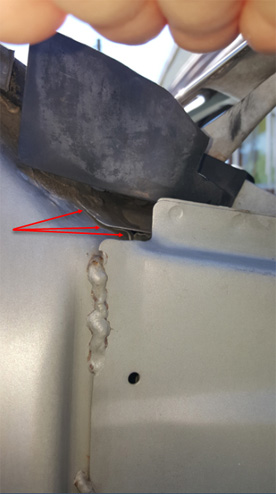
underneath the rubber drip shield that surrounds the hood hinge
(photo 06);
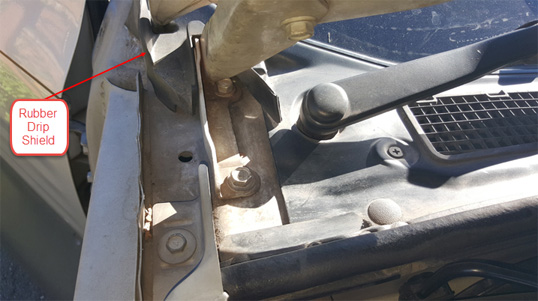
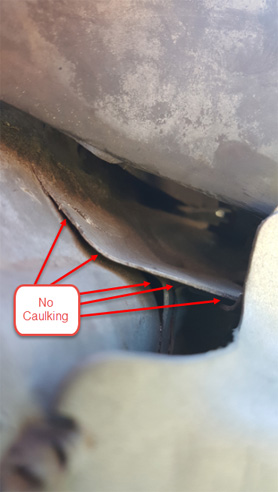
a middle quarter, behind a reinforced box section
(photo 07)

and (photo 08)
as viewed through the access hole in photo 04 above also indicate no caulking and finally a lower half
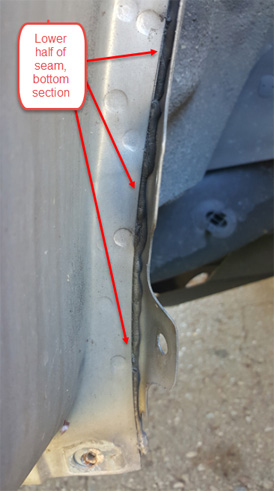
(photo 09)
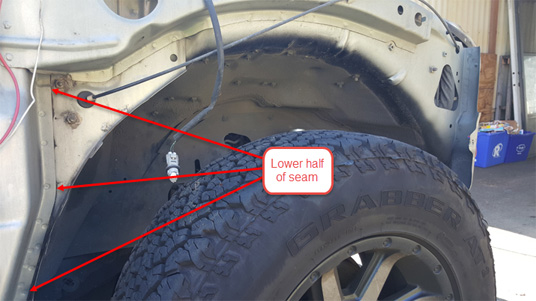
(and photo 10).
The top two quarters of this seam has no caulking and water can wick through to the interior.
(See photos 11 below & 08 above),
End of SECTION 1. Continued in SECTION 2.

 Reply With Quote