Page 1 of 2 1 2 LastLast
Results 1 to 15 of 28

Thread: MF! VX Kaput

  1. #1
    Member Since
    Nov 2012
    Location
    1999, Blue (Astral)5 spd VX #1396 ; '01 Proton 0753
    Posts
    775
    Thanked: 3

    MF! VX Kaput

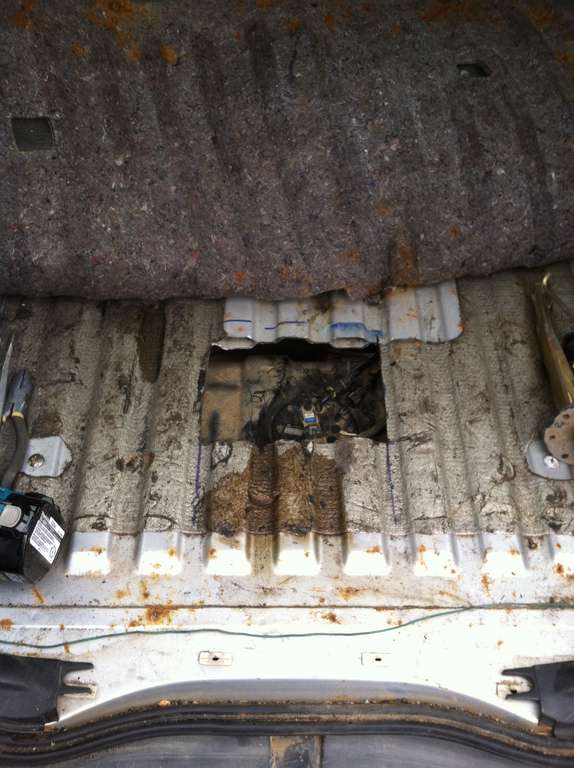
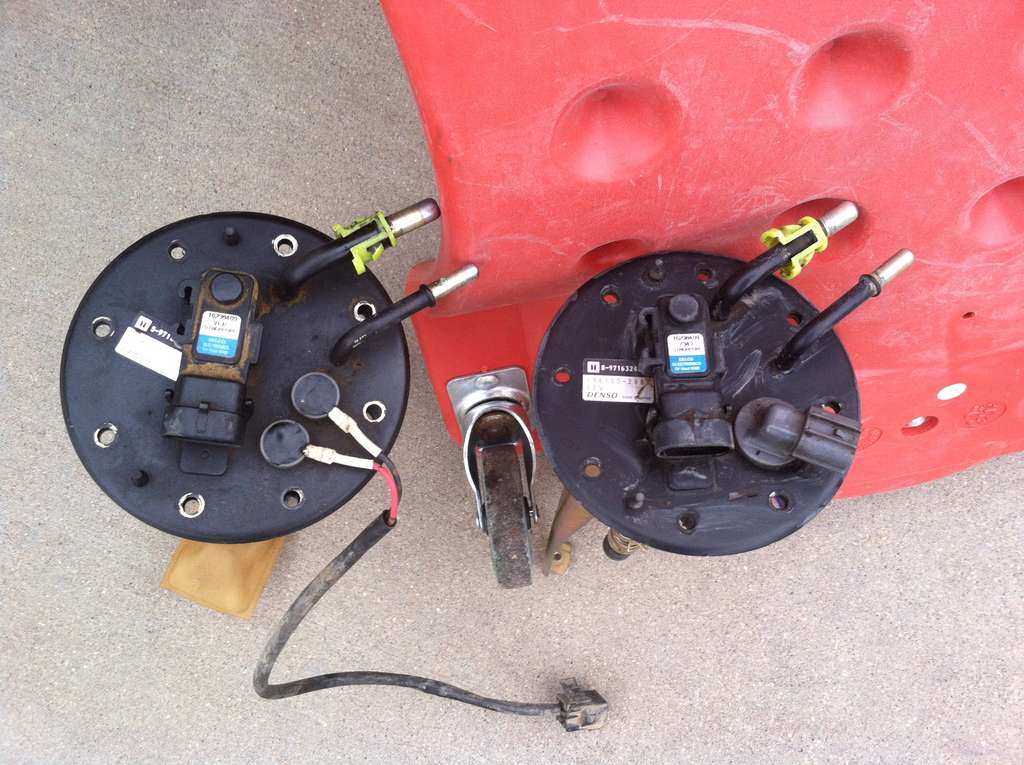
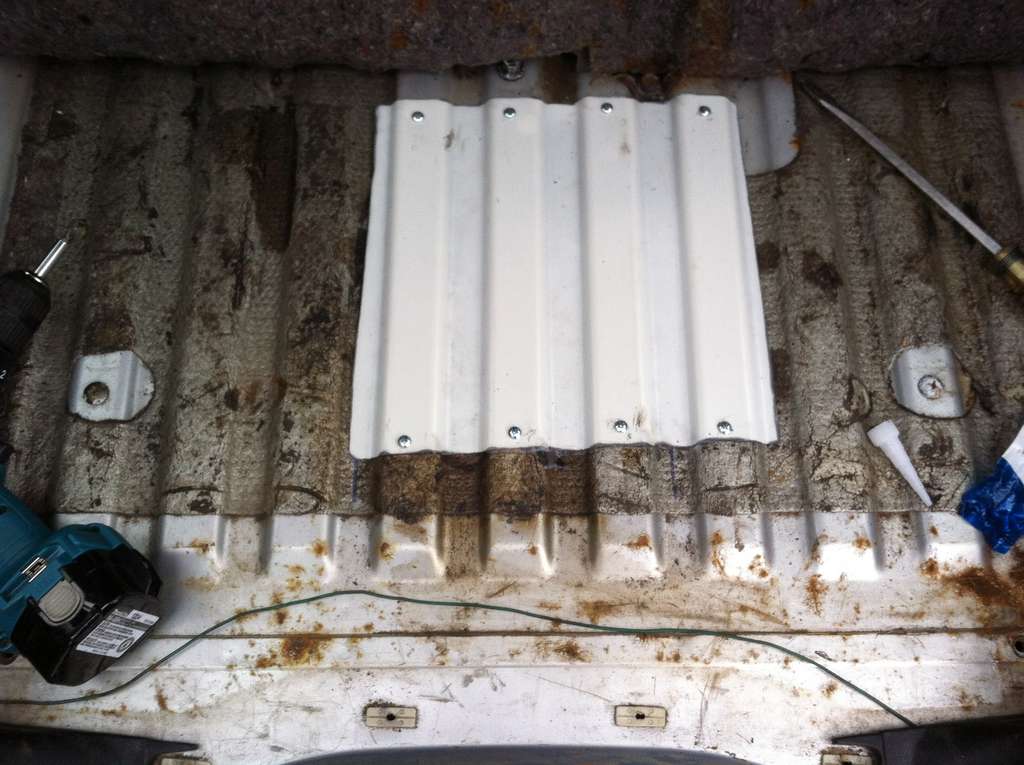
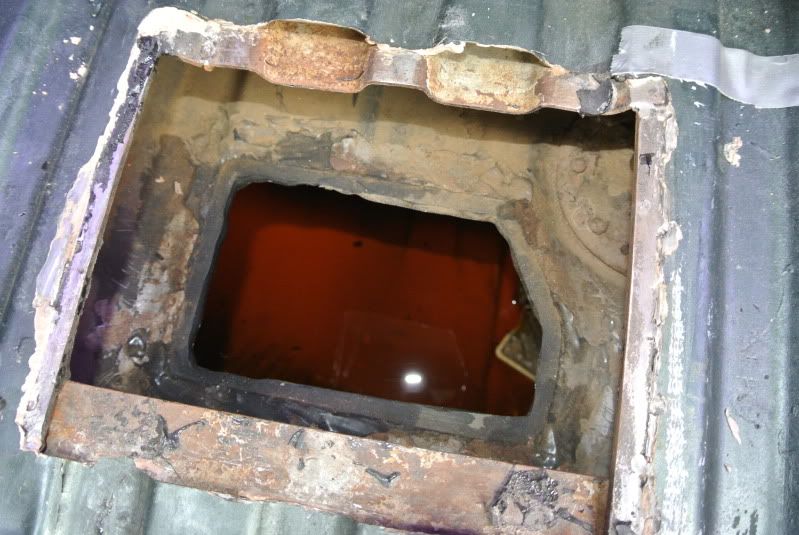
    Went for a haircut and she wouldn't start afterwards. Appears to be a fuel pump issue. I don't hear the pump at all and I pulled the line going to the filter and had someone crank her over - no joy. Fuse OK and I swapped the relay with the starter relay - nope. I jumpered out the relay connector pin according to the manual - negative. I am going to have a buddy tow me in the AM, I just hope it doesn't get towed in the meantime. I am considering cutting an access hole trough the rear floor, I saw that JPuga87's ride had this done but from the pictures it looks like the wrong spot. Thoughts?


    http://www.vehicross.info/forums/sho...8&postcount=19

  2. #2
    Member Since
    Dec 2008
    Location
    01, LineX tan/black, 1055
    Posts
    3,380
    Thanked: 0
    You should be able to follow the wires to the top of the tank and feel by hand where it is from the rear and the side. Kind if eyeball the location from above and cut a small hole to get started. I need to do the same on mine as I carry an extra fuel pump on the trail. On the Planet, I am sure there is a thread about it there. Get yourself some silicone and some aluminum angle so you can make a new frame and voila, easy access to the fuel pump forever!

    I predict future happiness for Americans if they can prevent the government from wasting the labors of the people under the pretense of taking care of them.
    Thomas Jefferson

  3. #3
    Member Since
    Jun 2009
    Location
    99 Matte Midnight Sand Met... oh nevermind. VX #0377...Project ZU
    Posts
    2,656
    Thanked: 4
    It's pretty easy to drop the fuel tank. Once the skid plate is off, it's 6 bolts to drop the tank and I remember mine dropped low enough to work on without disconnecting every line.

    ...but having an access flap would be pretty good for future repairs. I'll need to do the same thing because the gas tank lift required me to modify the mounts so I can't drop the tank.

    Quote Originally Posted by Marlin View Post
    I need to do the same on mine as I carry an extra fuel pump on the trail.
    Good Call. I like carrying extra axle shafts and an alternator. Didn't think about a fuel pump but they do die suddenly and will leave you stranded. I'll probably add a spare fuel pump to my inventory before summer.
    Last edited by VXorado : 02/03/2013 at 07:15 AM

  4. #4
    Member Since
    Nov 2012
    Location
    1999, Blue (Astral)5 spd VX #1396 ; '01 Proton 0753
    Posts
    775
    Thanked: 3
    Well, good news all around. My VX didn't get towed over night and the parking lot I was in includes a CarToys. The guys there helped me push her a little closer and let me plug in an extension cord for my angle grinder. Since I have a '98 Trooper parts car I was able to cut it's floor board first as practice and measurement and to get a free replacement fuel pump. It also provided me with a patch piece for the access hole in the VX. The Trooper was much easier to cut but I was eventually able to get the VX done too. This hole makes it so easy to replace the fuel pump! Once replaced she started right up.
    Not the cleanest cut but functional.

    Interestingly the VX pump assembly is a little different than the Trooper. The pump voltage feed is hard wired at the VX pump and the Trooper has a connector at the pump. Both have another connector attached to the side of the tank. I used just the pump from the Trooper until I got my VX home and then switched over to the entire Trooper assembly. My original assembly had a bit of corrosion on it so there may be a tank swap with the Trooper in the future. You can tell this wasn't originally a Colorado car...
    Some RTV, self tapping screws, and the patch plate removed from the Trooper completed the job.

  5. #5
    Member Since
    Feb 2007
    Location
    2000 Proton VX - 0776
    Posts
    9,258
    Thanked: 0
    Glad you had a relatively easy fix.

    Also glad you were able to get those pesky little phillips screws out without stripping/breaking them. Last time I had to replace a fuel pump, I wasn't so lucky.
    [SIGPIC][/SIGPIC]

    Put a smiley after you say that Bub.

  6. #6
    Member Since
    Mar 2012
    Location
    sold
    Posts
    1,158
    Thanked: 0
    check the pressure on the valve on the fuel rail on the top side of the manifold - if you have pressure its not the pump - i almost dropped my fuel tank to change it until i realized it was the starter - does it click when you turn the key?

  7. #7
    Member Since
    Nov 2012
    Location
    1999, Blue (Astral)5 spd VX #1396 ; '01 Proton 0753
    Posts
    775
    Thanked: 3
    Quote Originally Posted by evillecutter View Post
    check the pressure on the valve on the fuel rail on the top side of the manifold - if you have pressure its not the pump - i almost dropped my fuel tank to change it until i realized it was the starter - does it click when you turn the key?
    Thanks but...
    You may want to have a cup of coffee and re-read this entire post.

  8. #8
    Member Since
    Mar 2012
    Location
    sold
    Posts
    1,158
    Thanked: 0
    sorry - 10-4 on the coffee

  9. #9
    Member Since
    Jun 2009
    Location
    99 Matte Midnight Sand Met... oh nevermind. VX #0377...Project ZU
    Posts
    2,656
    Thanked: 4
    Nice job Scott.

    Thanks for the pics, i'll use them to mark out my floor cut.

  10. #10
    Member Since
    Aug 2012
    Location
    99 Ebony Vx's, 0054 & 1548
    Posts
    349
    Thanked: 0
    Good Thread... I had done this to my old Zu Amigo years ago. I have had this on my mod list for a couple years. Hopefully your thread will put some fire under me.
    thanks

    Glad your vx sat over night unharmed. Bet you didn't sleep so well....

    Life is better when you go Topless

  11. #11
    Member Since
    Nov 2012
    Location
    1999, Blue (Astral)5 spd VX #1396 ; '01 Proton 0753
    Posts
    775
    Thanked: 3
    Quote Originally Posted by VxSport View Post

    Glad your vx sat over night unharmed. Bet you didn't sleep so well....
    HaHa, no I did not!
    Thanks,
    Scott

  12. #12
    Member Since
    Feb 2010
    Location
    1999 Ironman,#1-1767, #2-1326
    Posts
    504
    Thanked: 0
    do you remember the distance from the back door jam or where the seam is?

  13. #13
    Member Since
    Dec 2008
    Location
    01, LineX tan/black, 1055
    Posts
    3,380
    Thanked: 0
    Billy, this should be easy since my rear is empty, we can measure from the end of the factory floor coating. I want to do this on mine as well, we can experiment with mine, then do the final on yours.

  14. #14
    Member Since
    Dec 2008
    Location
    01, LineX tan/black, 1055
    Posts
    3,380
    Thanked: 0
    Went ahead and cut the plate in my truck. Cut it too small, had to take another piece out. I welded those back together. I ahve about an 1/8" of herculiner back there, so it was hot enough to be melted under the outer shell, just pushed it back into the weld groove with a chisel Never know it wasn't one piece from above. Billy is picking up some steel so we can make the brackets to hold the final plate in. I will seal it with RT and then touch up herculiner over it. I may pull all the what were once phillips head screws. They are rusted pretty much flat. Rather do it now than on the trail
    Not a terribly hard project and will save LOTS of time if I need to swap the fuel pump one day.

  15. #15
    Member Since
    Dec 2008
    Location
    01, LineX tan/black, 1055
    Posts
    3,380
    Thanked: 0
    Came out great! Never even know it was there except the 8 extra bolts heads, but I sunk them into the bedliner so they are pretty flush. This little project will turn a 10 hr beast of a day to get the cladding and tank do down and back up into a 1-2 hour pump swap. I am going to address the rusted out screws later. None of them even have a pattern left on top to put a screwdriver in. I am going to cut them off, rotate the entire assembly a 1/4 turn or so, drill new holes (4 or 5 instead of 8, I think 8 is way overkill) JBweld bolts from the inside of the tank. This will allow me to use nuts vice screws and not worry about corrosion as much. Save a ton of time in the future.

Posting Permissions

  • You may not post new threads
  • You may not post replies
  • You may not post attachments
  • You may not edit your posts
  •  
$lv_vb_eventforums_eventdetails