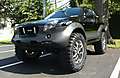
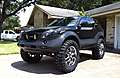
IIRC, the bearings get service by default when replacing the rotors. I'll have to read the instructions to verify but the bearings should be either press fit or machine fit to the hub of the rotor.
[SIGPIC][/SIGPIC]
Put a smiley after you say that Bub.
You will need the hub tool to remove the nut holding the rotor onto the spindle. You will also need it for re-assembly, as well as a scale to determine pre-load on the nut so that you don't crank the nut down too much and bind the rotor up which would result in HORRIBLE gas milage.
The bearings literally just drop into the rotor. No pressing necessary. There is a seal that goes in behind the bearing at the back of the rotor, but the front one is held in when you sandwich the whole assembly back together.
I would strongly suggest reading this: http://www.vehicross.info/forums/sho...bearing+repack It gives a step by step how-to on replacing the front rotors and repacking the bearings. There is a link in that thread to a how-to over on "The Planet" and that write up lists the tools and expendables that you will need to do the job right.
"The major difference between a thing that might go wrong and a thing that cannot possibly go wrong is that when a thing that cannot possibly go wrong goes wrong, it usually turns out to be impossible to get at or repair."
-Douglas Adams, Mostly Harmless
I picked up 4 zinc plated drilled and slotted rotors and ceramic brakes for $150 off ebay. Napa had two grades of bearings the best set will cost me $255 for the bearings, races and seals. I hope misc. should be around $50 (grease, cleaner, rtv sealer, etc). A buddy of mine has access to a bearing press to install the bearings into the hubs. Looks like every thing is falling together for this project to happen in a couple weeks.
Question: Do I really need a fishing scale to neasure the pre-load for hub nut or will a torque wrench get the job done?
Thanks all for the help,
Soggy
You'll need some kind of scale to determine pre-load. A torque wrench will just get the nut tight, but not be able to tell you how much force it takes to rotate the hub. I was a little confused about that part too, but now that I've done it a couple of times it makes sense. You use the spring scale to pull the rotor around to make sure that the hub nut is tight, but not too tight. Too loose and things could move around killing the bearings (or some other catastrophic failure), and too tight will kill your gas mileage.
Also, you don't need a bearing press. The bearings just drop in and are held in place once everything is tightened down. To get the bearing seal in at the back of the rotor I just used a 2x4 laid flat across the seal and then gave it a good whack with a rubber mallet. Seats the seal in nicely.
Go with R1 Concepts! Great product. I posted about them back on 1/23/11 and I had my 'bee' out a couple of times lately since the weather is breaking around here in my part of MI. I got a great price and did other stuff like bearings, seals, while I was at it. I'm EXTREMELY HAPPY with the results AND they were very affordable. I also used silver 'high heat' paint on the non-machined surfaces and used 'proton yello' on the calipers to match my
'bee' . Looks cool! Look for the 'deals' as they come up 'on-n-off' at R1.
Below is my orignal post:
New Rotor and Brake Pad Install - It's Great!
I just finally replaced my stock rotors with R1 Concepts Cross-Drilled/Slotted Rotors front (#EDS-43013) and rear (#EDS-43015). Since I typically lay up my VX during the winter months this was a great time to get this done. I used Hi-Temp 1200 degree paint on all the non-machined rotor areas and decided to use the EBC 'Ultimax' SUV performance pads too (#UD579-FRONT/#UD580-REAR). Went and replaced inner/outer bearings, races, and seals while I was at it and I could not be happier with this combination! The Bee stops unbelieveaby better! Total cost for parts, paint, etc. was less than $700.
It was the best procrastination I ever subjected myself to in recent history. I usually take 'forever' to make decisions on stuff like this. If you're considering brake upgrades for the VX, this is a great combo!