No PB blaster on the splines...Originally Posted by Marlin


 Super VXer
No PB blaster on the splines...
Super VXer
I did spray em down afterwards for the reinstall, really no way to get it in there prior to removal.
I predict future happiness for Americans if they can prevent the government from wasting the labors of the people under the pretense of taking care of them.
Thomas Jefferson
Super VXer
Hmmm... I wonder how much faster this would go if you weren't practically tweeting your progress every hour.J/k, more than a few of us have forgotten to take pics as we went, leaving others in the dark when they try it themselves.
Looking good!
Super VXer
That's why it's called penetrating oil. You douche everything down a day or two in advance, then an hour or two before you turn a wrench, to make life easier...
Super VXer
Well, after breaking a breaker bar, I got out the old Craftsman pro series 1/2" drive. Using that, an extension so I could reach the bolt and a 4 foot pipe, got em out. Only to realize I am missing page 4 of the install instructions!!! I am trying to puzzle it out, but damn, its not as simple as you would think. He spent some serious time measuring and engineering this thing. Now I am on pause awaiting his email.
Super VXer
Now we are getting somewhere. Got it all mounted up, I think my exhaust may end up being a problem. I have a flowmaster 40 in there, and the flange lines up perfectly with the IFS kitI just used a pry bar to get it in there. We will see. Off to the parts store to get a 1.5" open end box wrench...thought I had everything.
Won't be able to test it till next weekend, gotta get the axle in first. Supposed to rain tomorrow and tuesday.
Super VXer
Shew, finally got it done, kind of. The truck is drivable. Still need to level out the front end, and I have some clacking, but I think its cause my CVs are at a negative angle right now, or it could be something rubbing, not sure...I am beat, it took about 5 hours to get the axle back up, the cvs in, the ifs kit tightened up (which I think I will have to reindex the passenger side torsion bar, that should take a good 30 minutes or so) Hopefully the clacking goes away, or else I will be taking the drivers side cv out and checking on what is going on in there.
Final tally, 1 broken 3/8 drive craftsman ratchet, one broken 1/2" drive pro series craftsman ratchet, one broken 1/2" drive breaker bar (HF junk) two cans of liquid wrench, 2 quarts of royal purple gear oil, couple cans of primer and engine paint, 3 cans of duplicote rubber spray, multiple bruises and bloody knuckles. I should be ready for uwharrie next weekend. I did try to pull the pin on the IFS kit, no way that thing is coming out, gotta figure out whats up with that.
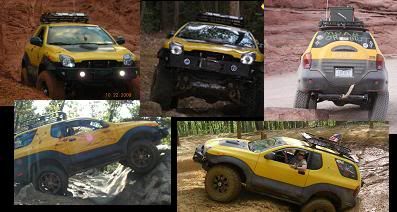
Here are a few pics, its amazing how much of a difference there is between stock size tires and the 34s
[CENTER][/CENTER
]
Last edited by Marlin : 12/04/2010 at 01:52 PM
Super VXer
And this post is just for Ldub:
Cliffnote version, took some stuff apart, put some stuff together, I am practically done.
Volume two will be out tomorrow.
Super VXer
Next time, write a post-it "note to self" & stick it to your tool box...
"Self: wait till I'm done, then post a cohesive, readable, not chopped into little bits, actual how to"...
Also, learn the function of PB blaster...
Super VXer
I understand, if it was something lame like a simple lift, or roof rack install, I would wait, but since so many folks are waiting on the IFS kit info, this is a hot topic, kind of like the release date of the Red Dawn remake...
It also gave me a chance to take a break and step back a few minutes at a time.
As for PB blaster, its a generic term I use, kind of like Q tip or Kleenex. It was actually one can of WD40, and one can of Liquid Wrench.
As for the toolbox, whats that? Is it like the tarp in the driveway with the pile of tools in it?
Super VXer
Aight thain...we'll be waiting for the updates on the quarter hour...
Super VXer
I think we had a miscommunication. This was never meant to be a how-to, that is already done by Phines. I actually used his with a few minor changes. I have some photos to add to his write up and some suggestions.
This was just to give you guys something to look at and something to read.
Super VXer
Done.
I ended up lifting 3 inches. The rear sits about 3/4 inch higher than the front. Not as high as I had it before, it was completely level. My ride isn't as stiff as before, I kind if miss the bone jarring bumps.
I ended up not indexing the passenger side. I still have about 2/3 of the nut with threads. I think it will be fine, but if I need to, I can. (the nut is like 1.5" long)
The clacking went away as well. Once the CVs were level, no problems. My CVs are now just out of level, much better than the ridiculous angle they were before the drop. I would have to work pretty hard to break one now.
The pin seems looser now that I have the truck leveled out. Still haven't pulled it. Now I have to make my new crossmember, or mod the existing one. Then the worst thing ever, clean out the garage. It is so bad right now that it isn't even usable.
On a side note, I don't think lowering the VX via torsion bars would be a good idea. It would ride like garbage. Way to soft.
 Super VXer
Nice job Marlin. Do you have any additional pictures you can send me from the SFIFS install? I'll combine everything into one set of instructions that others can download from the site.
Last edited by phines : 05/25/2011 at 07:15 PM
Super VXer
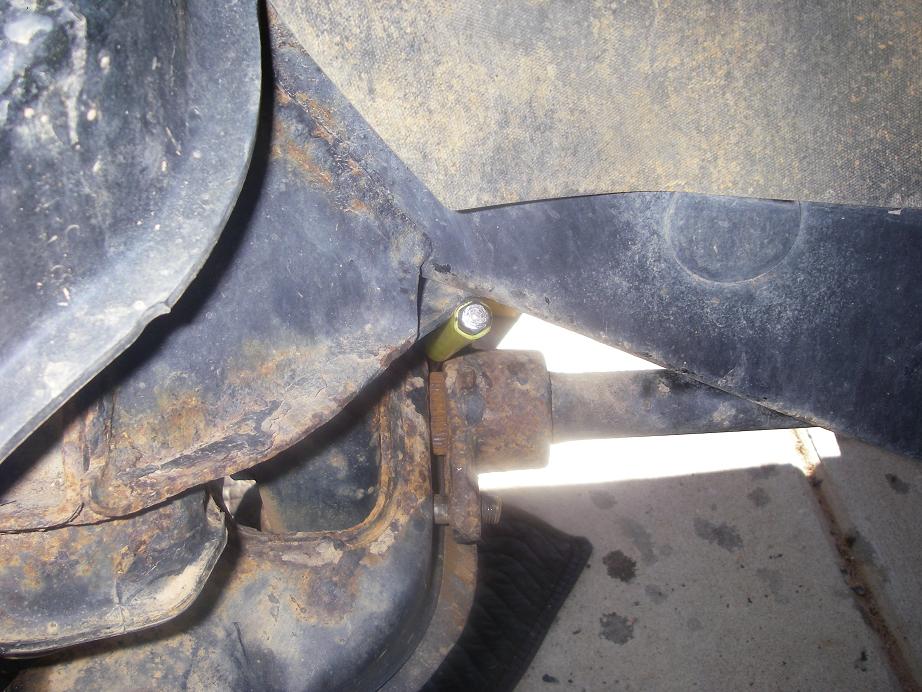
Yep, I will put them together. I do have a question. The drivers side zerk fitting is clearly visible on the square plate that the torsion bar key sits in. On the passenger side, its not visible and inside the confines of the torsion bar key. Seems to me they should be symmetrical? Just wondering, I haven't tried the pin pulled, but both torsion bars are lined up appropriately.
As far as suggestions, I would recommend that the torsion bars be on their forward mounting bolts prior to aligning the keys. I would also recommend that the keys be aligned such that they are leaned toward the inboard vice vertical. Especially if you are going to lift the truck. Otherwise you run into the reindexing that I might have to do. I figure 99% of those that would use this will be lifted 2-4" in the front.
I will get everything together once I test it next weekend.
 Posting Permissions
 [/CENTER]

 Reply With Quote