Page 1 of 2 1 2 LastLast
Results 1 to 15 of 17

Thread: My Headlight Restoration Write-Up

  1. #1
    Member Since
    Dec 2008
    Location
    1999, Ironman, 1705
    Posts
    157
    Thanked: 0

    My Headlight Restoration Write-Up

    Since I have not posted in a while I thought I would contribute in the little ways I can... So with that said here is how I restored by head lights

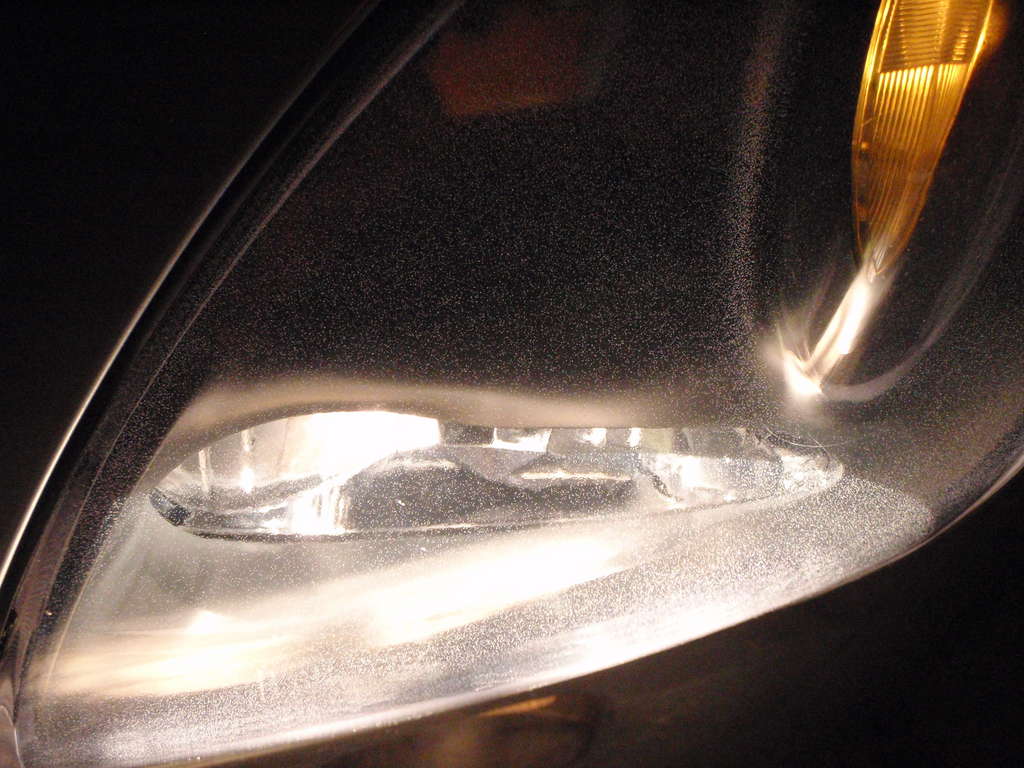
    Problem: My headlights were RIDICULOUSLY GROSS AND YELLOW!! (don't have a camera capable of showing the pics how bad it was)

    Items Needed:
    1) Brillo pads Cost: $2~$4 (Wal-Mart)

    2) 2000 wet/dry Sand paper (I used 4 small 9'' by 11'' pieces) Cost: $3~$5 (AutoParts Store)

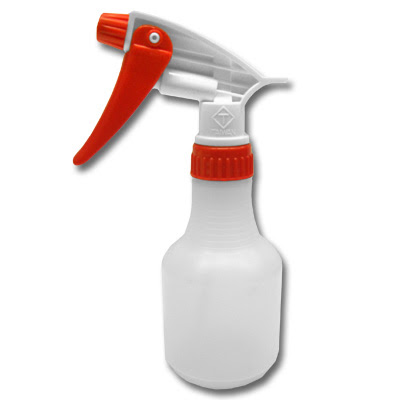
    3) Spray bottle Cost: $1~$3 (Wal-Mart)

    4) Meguiar's PlastX Cost:$5-$7 (AutoParts Store)

    5) Polishing pad for a drill Cost:$20~$21 (AutoParts Store or EBay for roughly $10)

    6) Drill Cost: Borrow one if you don't own one


    Steps:
    1) Pop the hood and using the Brillo pad in circular motions, scrape off all the nasty yellow from the lens. Use the Water bottle to keep it nice and wet spraying as you go along. This should scratch the lens a lot, but don't worry, just keep going till the years of oxidization are gone. (Took me roughly 10 minutes each headlight, but mine were BAD!)

    2) Use the 2000 grit sand paper (or higher if you can find it, 2500 is plenty high) and keep the headlight wet while you go to town on it to remove the scratches you just made with the Brillo pad. It should look really good as of this point, but you will notice still tiny scratched all over it. (Took me 10 minutes each headlight, take the time during this step, it really matters!!)

    3) Use the drill, buffer pad and Meguiar's PlastX with the drill on high and apply medium pressure as not to rip up the pad but to buff out those tiny imperfections. (Took me about 8~10 minutes a headlight)

    4) Apply a coat of the Meguiar's PlastX and buff out with a towel

    5) Stand back and admire how amazing the VX looks for hours till your friends tell you you are annoying and mention how you won't stop talking about how cool the headlights look

    Photo #1 (sorry i have a horrible camera and this was at night)


    Photo#2


    If I had something other than a crappy camera phone you could see they are crystal clear!!! Hope this helps.

    Braden Morris
    Last edited by killinformula : 07/27/2010 at 09:36 PM

  2. #2
    Member Since
    May 2010
    Location
    1999 Ebony 1716
    Posts
    1,196
    Thanked: 0
    I have a 3M headlight restoration kit that worked well on some other headlights that I want to try to use this weekend. Hope I get good results on these.

    and the lights you did look great, even through those crappy pics!

  3. #3
    Member Since
    Jul 2010
    Location
    99 sliver vehicross 0969
    Posts
    31
    Thanked: 0
    looks good im gonna try it thanks
    Codyman checking out!!

  4. #4
    Member Since
    Feb 2010
    Location
    2001,Kaiser,1130
    Posts
    346
    Thanked: 0
    Quote Originally Posted by Bob Barker View Post
    I have a 3M headlight restoration kit that worked well on some other headlights that I want to try to use this weekend. Hope I get good results on these.

    and the lights you did look great, even through those crappy pics!

    I used the 3m Kit, it worked amazingly. Be careful with the horn area (the horn of the light) because its hard to maneuver the spinning disk. Make sure you tape the hard plastic of the 3M pad with masking tape so you don't melt the headlight plastic when you tilt the drill

  5. #5
    Member Since
    May 2006
    Location
    SOLD!
    Posts
    7,257
    Thanked: 2
    My experience is that once you do the restoration, the yellowness comes back quickly. I think there is a UV coating that comes off when you do this that makes them get the yellows much faster. At least that was my experience.

    Bart

  6. #6
    Member Since
    May 2010
    Location
    1999 Ebony 1716
    Posts
    1,196
    Thanked: 0
    I just always kept a heavy coat of wax on mine after I restored them. Don't know if that helped or if it was just a different headlight all together.

  7. #7
    Member Since
    Apr 2008
    Location
    2000 Foxfire Red Mica, 0555 (RIP) & 0717
    Posts
    6,229
    Thanked: 3
    Quote Originally Posted by Bob Barker View Post
    I just always kept a heavy coat of wax on mine after I restored them. Don't know if that helped or if it was just a different headlight all together.
    My previous car (G35) had headlights that were notoriously bad for yellowing, and although I never tried the 3M kit on them, I did use 3M's Plastic Cleaner and Plastic Polish compounds every few washes. One of those compounds (can't remember which) is what comes in the 3M kit, and they can both be applied by hand with pretty good success. I imagine that once you use the 3M kit to get rid of the surface roughness (mine was really bad) you could follow-up every few months with those compounds to keep them clear.

  8. #8
    Member Since
    Dec 2008
    Location
    1999, Ironman, 1705
    Posts
    157
    Thanked: 0
    Quote Originally Posted by nfpgasmask View Post
    My experience is that once you do the restoration, the yellowness comes back quickly. I think there is a UV coating that comes off when you do this that makes them get the yellows much faster. At least that was my experience.

    Bart
    That is one of my fears but I have looked into it and there are simple ways to keep the headlight from oxidizing again

    Covering Methods (just a few of them)
    1) Clear coat them
    2) 3M makes a clear film
    3) There are clear films made by companies that are more like clear bra covers, they help against chips as well from rocks and scraping against branches

    Treatment methods
    1) Use a clay bar every few months
    2) Use a clear plastic polish, many at the local auto store are specifically designed to give a tiny polish but primarily prevent oxidization
    3) Wax them
    4) Baking soda

    Just restoring the headlight is not sufficient... just as everything it requires the care after or it will be in vain, luckily the care is a lot easier than the cleaning

    Braden Morris

  9. #9
    Member Since
    Apr 2008
    Location
    2000 Foxfire Red Mica, 0555 (RIP) & 0717
    Posts
    6,229
    Thanked: 3
    Quote Originally Posted by vt_maverick View Post
    ...I imagine that once you use the 3M kit to get rid of the surface roughness (mine was really bad) you could follow-up every few months with those compounds to keep them clear.
    Quote Originally Posted by killinformula View Post
    2) Use a clear plastic polish, many at the local auto store are specifically designed to give a tiny polish but primarily prevent oxidization.
    Well there you go.

  10. #10
    Member Since
    Mar 2010
    Location
    2001 Ironman 0588
    Posts
    1,176
    Thanked: 0
    I used the Mother's Headlight kit and it mentions applying the polish monthly for "continued protection."

    You're so right about taking plenty of time on Step 2 (sanding with fine grit.) It was about 110 degrees in my garage the night I used the kit so I need to repeat that step and finish the job once it's a bit cooler. Oh well, it still looks a LOT better!

  11. #11
    Member Since
    Dec 2008
    Location
    1999, Ironman, 1705
    Posts
    157
    Thanked: 0
    Here are three more pics. Its still rainy hence all the water on the VX and again i have a HORRIBLE phone camera!!


  12. #12
    Member Since
    Dec 2008
    Location
    1999, Ironman, 1705
    Posts
    157
    Thanked: 0
    Quote Originally Posted by codyman3487 View Post
    looks good im gonna try it thanks
    Thanks and good luck! It is not bad at all, plus you get to show your car a little tlc

  13. #13
    Member Since
    Dec 2008
    Location
    1999, Ironman, 1705
    Posts
    157
    Thanked: 0
    Quote Originally Posted by RickOKC View Post
    I used the Mother's Headlight kit and it mentions applying the polish monthly for "continued protection."

    You're so right about taking plenty of time on Step 2 (sanding with fine grit.) It was about 110 degrees in my garage the night I used the kit so I need to repeat that step and finish the job once it's a bit cooler. Oh well, it still looks a LOT better!
    Any photos? If so post them up

  14. #14
    Member Since
    Jul 2004
    Location
    2000, Kaiser Silver, 0196
    Posts
    497
    Thanked: 0
    Quote Originally Posted by nfpgasmask View Post
    My experience is that once you do the restoration, the yellowness comes back quickly. I think there is a UV coating that comes off when you do this that makes them get the yellows much faster. At least that was my experience.

    Bart
    Not only that but they will scratch much easier after you sand the hard protective coating off. You need to clearcoat them after you polish them.

    But a word of warning for those in the South - if you do this in summer, wait until they are FULLY cured before taking outside to reinstall. I learned this the hard way. I was in a hurry. A few hours after spraying, the fresh clearcoat felt cured enough to work with. Looked really good too - if you think polished headlights look clear wait until you clearcoat them - they look absolutely brilliant. Anyway - wanted to get the lights back in and the cladding on before dark so took lights from 70 degree a/c air (dry) to outside where temp and humidity both were in high 90's. Doh! Forgot basic physics and chemistry - vapor expands when heated! Within 3 minutes whole thing had jillions of almost microscopic bubbles in the clearcoat. The surface is smooth - bubbles are deep down in the clearcoat so apparently the surface was fully cured but below the surface - not so much... It was still elastic enough for water vapor or VOC or maybe both to expand...

    What an amateur, eh? Can't really see it during the day but at night when the lights are on those tiny bubbles sure do light up!


    Yes, there is more sanding, polishing and clearcoating of headlights in my future - but not until Fall, of that you can be sure!


  15. #15
    Member Since
    Mar 2010
    Location
    2001 Ironman 0588
    Posts
    1,176
    Thanked: 0
    Quote Originally Posted by killinformula View Post
    Any photos? If so post them up
    Oh, no way - no photos yet. Like I said, I skimped on the fine sanding so while they look better, they don't look "good".

Similar Threads

  1. 3M Headlight Restoration Kit
    By VX KAT in forum General Tips...
    Replies: 33
    Last Post: 11/09/2012, 09:58 PM
  2. Meguiars Headlight Restoration Kit
    By nfpgasmask in forum VX Talk...
    Replies: 16
    Last Post: 01/06/2009, 07:58 PM
  3. Headlight Restoration
    By crager34 in forum General Tips...
    Replies: 4
    Last Post: 02/04/2008, 10:48 AM
  4. Removing headlight bulbs; any 'how-to' write-ups?
    By PHO2GR4 in forum VX Modifications...
    Replies: 4
    Last Post: 02/08/2007, 04:49 AM

Posting Permissions

  • You may not post new threads
  • You may not post replies
  • You may not post attachments
  • You may not edit your posts
  •  
$lv_vb_eventforums_eventdetails