Results 1 to 15 of 20

Thread: Rear cargo conversion (inspired by Kenny)

Hybrid View

Previous Post Previous Post   Next Post Next Post
  1. #1
    Member Since
    Dec 2008
    Location
    01, LineX tan/black, 1055
    Posts
    3,380
    Thanked: 0

    Rear cargo conversion (inspired by Kenny)

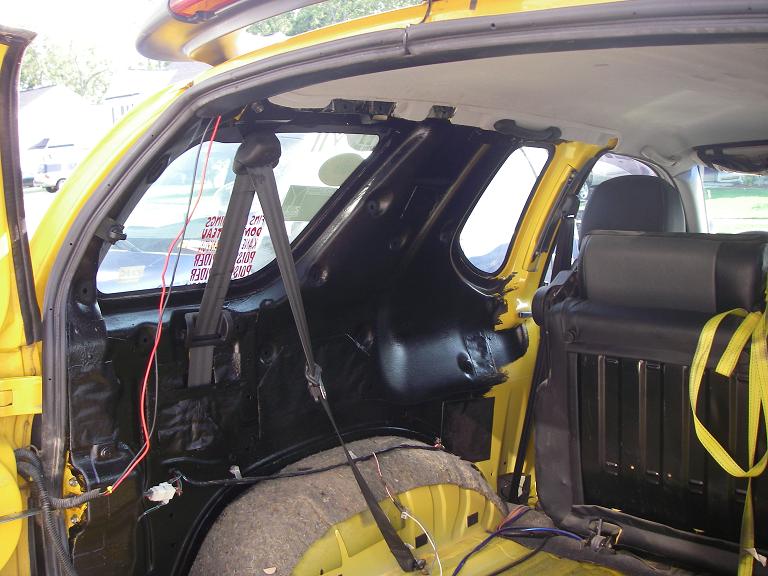
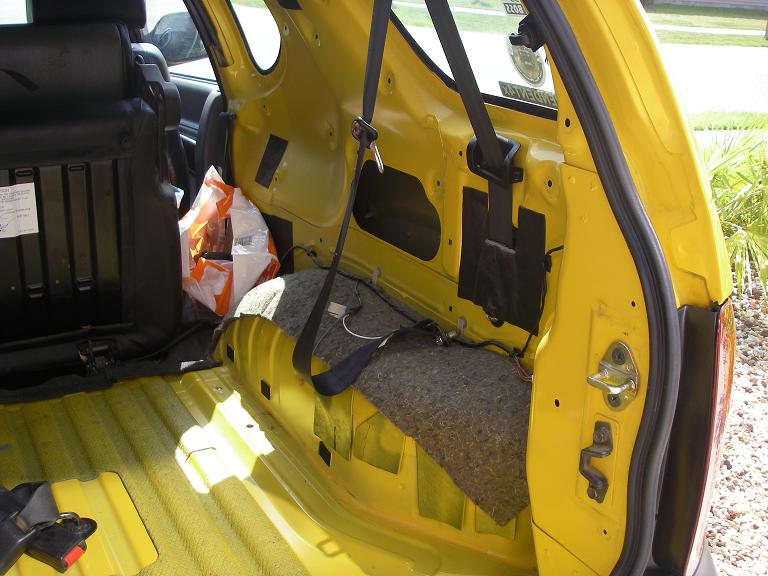
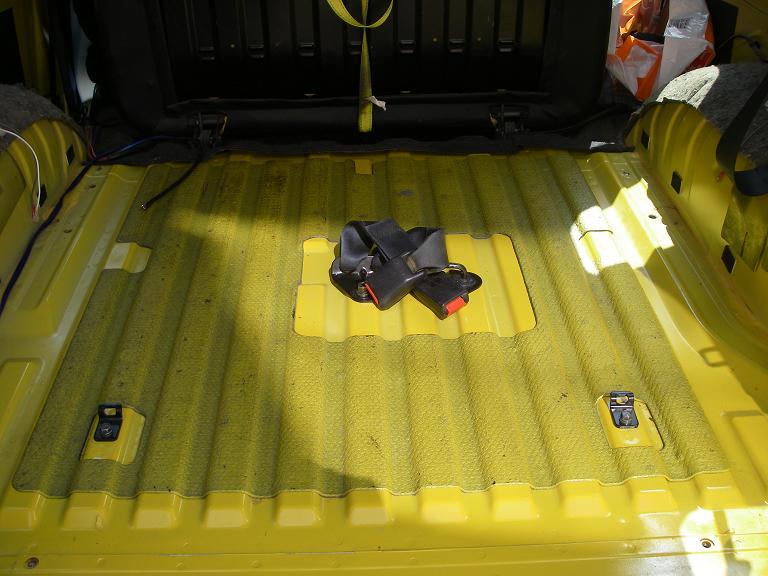
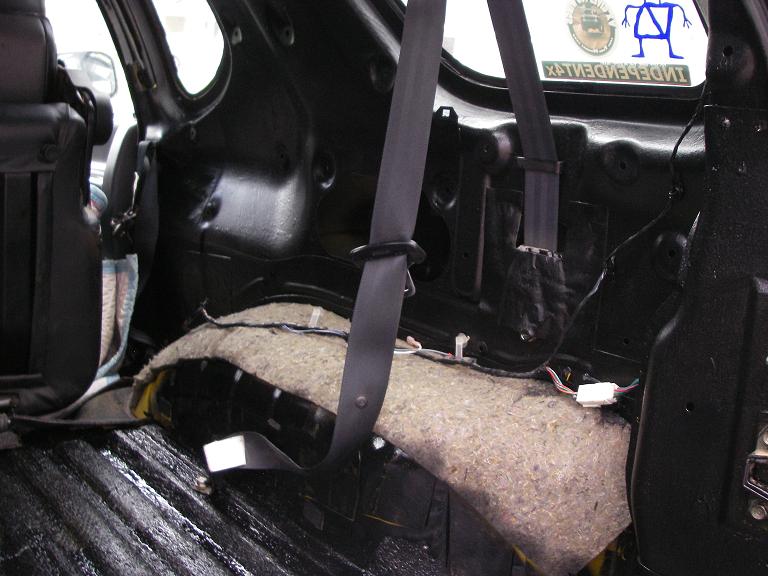
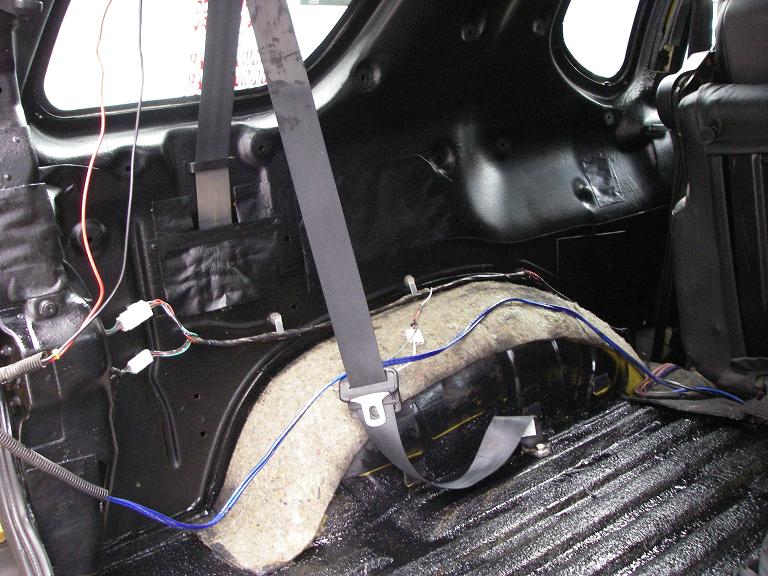
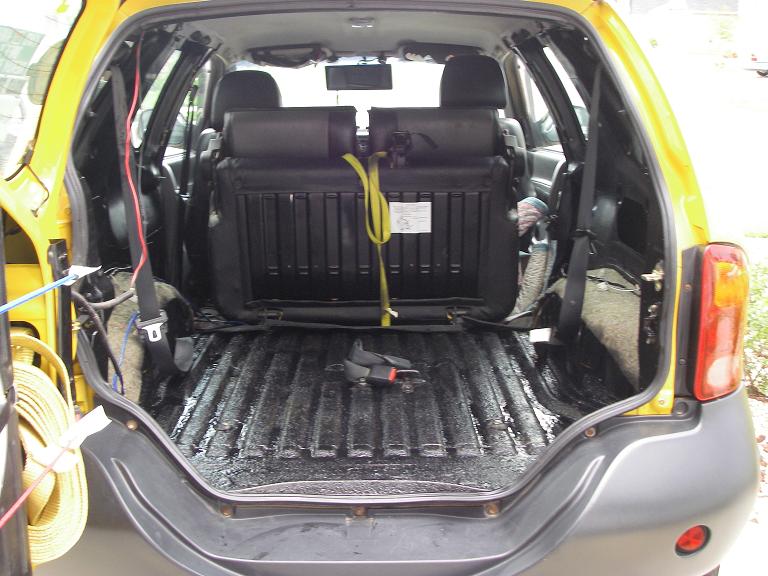
    Well, I had been daydreaming about Kenny's project all week. The wife gave the go ahead as our 9th anniversary present. I gutted all the plastic out this morning, about 1hr. I then cleaned out all the crevices and Moab dust. (I feel your pain Bart, I can't even imagine doing the whole truck, but I am getting there). I got out the angle grinder and removed the factory jack mount. I now realize how much room is wasted with all that plastic. You can see how big the gap is between the rear seats and the body. Before I could only snug my CO2 bottle in there, now there is a ton of room. So I picked up a quart of rustoleum undercoat for the sides and a quart of herculiner for the floor. The ultimate goal is for this to be lightly hoseable. The rustoleum covers amazingly well, and you get a nice buzz while in there painting, even with a fan on and windows down. It dries hard to the touch in about 30 minutes and covered the yellow completely in once coat. I will finish other side tomorrow and the floor as well. I will add some cargo tie downs to the side and floor. Next up will be the wheel well covers. I will do similar to Kenny, only leave cubby holes in the rear and front, one for CO2 bottle, one for tow straps/first aid....In the front I will drill out a few holes and put in cup holders. That should give me a ton more convenient storage. The rear seats will be staying in. Its not that bad once painted. I need to get some flex conduit, rerun all the wiring, add some side mounted lights, mount the amp, and voila, a much more useable rear cargo space. This project should cost me less than 100 bucks total. The two cans were about 40 bucks together. I figure some treated plywood or perhaps masonite for the fender covers, I will herculine that as well. I will get some LED lights for the sides. This is a pretty fun project so far. Instant gratification kind of thing. The only thing that will cost me will be some 6x9s and some boxes. I will mount those high, similar to Ldub(IIRC) did in his.


    I predict future happiness for Americans if they can prevent the government from wasting the labors of the people under the pretense of taking care of them.
    Thomas Jefferson

  2. #2
    Member Since
    May 2006
    Location
    SOLD!
    Posts
    7,257
    Thanked: 2
    I finally got my Monstaliner test kit from those guys. My plan is to use that stuff to cover the entire interior's bottom half, and the outside parts that are black (on my Trooper). I'll let you know how that stuff works after I test it. its supposed to be UV protected and not as bumpy as Herculiner.

    Bart

  3. #3
    Member Since
    Dec 2008
    Location
    01, LineX tan/black, 1055
    Posts
    3,380
    Thanked: 0
    Sweet, let me know. After this, I am gonna POR-15 the frame and undercarriage. Soda Blast it in the driveway. I figure that will take me 3 or 4 days.

  4. #4
    Member Since
    Dec 2008
    Location
    01, LineX tan/black, 1055
    Posts
    3,380
    Thanked: 0
    Day two of the what my wife calls the "waste of time" project. I got the sides done and the floor rhinolined. I will move the amp and do the storage portion tomorrow and hopefully be done. Then I will do my overhead console. That should be interesting. I have touch up to do with the undercarriage coating.


  5. #5
    Member Since
    Dec 2005
    Location
    2001, Dragon Green, 1342
    Posts
    2,393
    Thanked: 0
    I really only have one question,

    WHY!

    Oh, and I got the the switches, thanks Chris
    Greetings, Earthling. We come in peace... Never mind "Paris to Dakar", the VehiCROSS looks ready for the Martian desert.

  6. #6
    Member Since
    Jan 2007
    Location
    VX Skeleton owner
    Posts
    1,190
    Thanked: 6
    I really only have one question,

    WHY!
    I would guess because cleaning mud, grease, and grime out of the VX's carpet gets old, not to mention repairing rips or snags from moving offroad gear in and out. Form follows function, so some of our VX's are destined for car shows, and some are destined for getting beat on offroad.
    The reasonable man adapts himself to the world; the unreasonable man persists in trying to adapt the world to himself. Therefore all progress depends on me.

  7. #7
    Member Since
    Dec 2004
    Location
    1999, Black, Vehicross, 1984
    Posts
    243
    Thanked: 0
    NICE! this is really coming together.

  8. #8
    Member Since
    Dec 2008
    Location
    01, LineX tan/black, 1055
    Posts
    3,380
    Thanked: 0
    I just got back from Harbor Freight. That place is the devil. I got some of the nite eyes caribiners. They fit the holes in the overhead perfect. I hung up the tow strap, flashlights, air hose for the CO2 bottle. The 6x9s are in their final resting place. Now all I need to do is hit the yards and get some factory drink holders for the arm rests. Too hot to work today. Gonna play some Final Fantasy XIII. Yippee for fathers day!
    I also picked up a small 3gal air compressor for 39 bucks. Good deal. They also had a 900watt generator for under 100 bucks. I did some research, only bad reviews I could find is that you have to replace the Chinese spark plug with a good one, and it is loud like a weed eater. It would be awesome for junkyarding. Then you could bring electric drill and impact wrench, sawzall...If I could find a place to mount that, then I would be zombie revolution prepared!!!!

  9. #9
    All the work youve done looks really great. My rig will never be a show truck thats for sure.Thanks for posting all the pics. It helps to know what your getting into with a project like this or the bumper you did.

  10. #10
    Member Since
    Dec 2008
    Location
    01, LineX tan/black, 1055
    Posts
    3,380
    Thanked: 0
    Quote Originally Posted by IRONVIKING View Post
    All the work youve done looks really great. My rig will never be a show truck thats for sure.Thanks for posting all the pics. It helps to know what your getting into with a project like this or the bumper you did.
    I am starting a new bumper now I will post up pics when everything is done, I am hanging all the tow straps and lights and whatnot from the overhead.

Similar Threads

  1. Rear Cargo Light- What'd I do wrong ?
    By handeeman in forum VX Modifications...
    Replies: 7
    Last Post: 10/08/2009, 01:22 PM
  2. rear cargo mat
    By Vehi-Cross-Az in forum VX Modifications...
    Replies: 37
    Last Post: 09/08/2009, 12:44 PM
  3. Rear Ashtray conversion to Cup Holder
    By t2p in forum VX Talk...
    Replies: 3
    Last Post: 04/07/2004, 09:32 AM
  4. Rear Cargo Mat Question(s)
    By t2p in forum VX Talk...
    Replies: 2
    Last Post: 03/29/2004, 12:51 PM
  5. Rear Cargo Storage unit
    By Moncha in forum VX Modifications...
    Replies: 15
    Last Post: 01/14/2003, 07:07 PM

Posting Permissions

  • You may not post new threads
  • You may not post replies
  • You may not post attachments
  • You may not edit your posts
  •  
$lv_vb_eventforums_eventdetails