Big job opp=awesome
No Vx work=bummer for us


 Super VXer
Big job opp=awesome
No Vx work=bummer for us
Billy Oliver
15xIronman
My Sponsors:
Accelerate3Coaching
TriSports.com (PM me for 1 time use 20% off code)
Super VXer
but big job opp could mean even more VX fun in the future! Delayed happiness, like wearing a condom
1999 Isuzu Vehicross-#1209- lots of mods - gone
1995 Honda Passport: Lifted, Locked, 34x10.50's, just a few things..-Click for build thread
 Super VXer
Hey guys, I know it's been awhile, but I still got the VX on my mind. When I first started thinking of rebuilding the VX, I always had some major things I dreamt of it being able to take on. My potential "been there done that" list included Moab, the Rubicon, Baja, Paris/Dakar rally, Pike's peak, and the King of Hammers. Now I know that's asking a lot, and I'm not saying it's even possible, but I'm giving it a go and trying anyways. Well, I'm out here with some buddies and we're talking up some big plans for maybe trying to run the Baja 1000 with this thing within a year or two. Not really any serious competing, but maybe running the race just to see if it could take the punishment and survive. If it does, we are looking at a possible trip down further south(like south america south) to go chase the rigs down at the Dakar rally. Again not really competing, just driving on the same terrain and trying to keep upDue to the previously mentioned job, a lot of parts that were on my "financially restricted" list are now back on the table. I'm not due back in country until late April/early May, but I plan on having the remaining parts already in the pipeline and waiting for me when I get there. At that point I'll have nothing but time to complete the build and start the testing(abusing) stage
Just thought I'd drop in a line and keep the fam in the loop.
The reasonable man adapts himself to the world; the unreasonable man persists in trying to adapt the world to himself. Therefore all progress depends on me.
 Super VXer
Good to hear from you Brother Beau...
Hope all is well where you are, be safe.
 Super VXer
Glad to see you checking in, dude!!! April/May? Wow, thas rough!
Bart
 Super VXer
HEY BEAU!! So... does that mean you are going to catch a ride with Bart to next year's 'Zoo????
Super VXer
Oh man I am drooling just waitng to see the goodie list!Glad to see you checking in safe and sound....even if it is just a teaser of things to come!
Super VXer
Hello all, long time no see. So I have been out contracting in 3rd world countries for longer than I’d like, and while it has gotten better over time, I haven’t been home all that much over the years. I should be starting a contract now where I am home significantly more and the VX will hopefully finally get the loving she deserves. Here’s what’s been going on up to this point:
I ordered two Artec trusses for the 60 and the 14B axles. They are Artec TR1401 and TR6031.
I still need to do some measurements to see what I am looking at for clearance with the steering. I want to do 50 degree steering using Branik Motorsports clearancing service. I still need to measure the axle tubes to see if I can get away with shortening them. Over the ensuing years, I have cut the old “inner C’s” off to make room for the Solid units. Now would be the time to shorten the axle width if it is going to happen. More on that later.
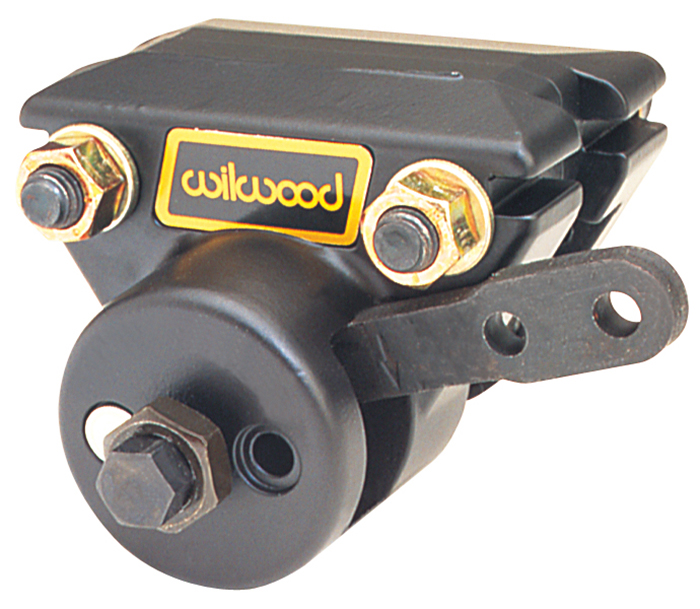
One of the things required to keep everything street legal is a parking brake. Most parking brakes are a little shoe on the inside of a brake drum. This is what the 14 bolt rear axle used to have before I dropped the dually drums off of it and converted it to single wheel and disk brakes. Now, there is effectively no parking brake. So I looked into alternatives. There are a lot of expensive options out there like this one:
For the low low price of $399 you too can have a transfer case parking brake!
Or, you can just make a mount, cut a piece of ¼” steel into a circle (for the disc) and buy one of these for $100:
I am ditching the stock E-brake handle because the mounting location for it is about to become a shift lever forest. I picked up a new blingy one from summit racing’s clearance rack for ~$20. I think I got a pretty good deal:
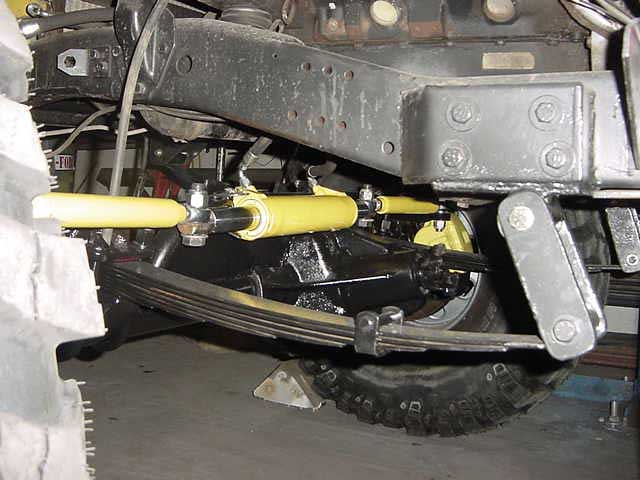
Moving on to the steering, which I am about to tackle next. I am attempting full hydraulic steering and a behind the axle mounting scheme with reversed high steer arms. Hydraulic steering is powerful, but has a bit of an Achilles heel. It is usually positioned out in front of the axle right where it can get bashed by rocks. So people mount it up high to hopefully avoid that. This is where high steer arms come into play. They bolt onto the top of a steering knuckle instead of about 2/3 the way down where your tie rod usually goes. I took it a step further and turned the high steer arms backwards (so they face rear) I am planning on mounting my ram above the pinion area of the axle to provide it some additional protection. The pinion area acts as a shield/sled as far as rocks are concerned. I am kind of going for what this guy has, minus the leaf springs:
I am a bit saddened because the ram I wanted to use is no longer being produced. Sean Stapley at Performance Offroad Systems is no longer in business and by all regards, his were the best. The current options available are:
>Surplus Center Ram-generic, but fairly affordable. Has welded on mount-not preferable, but it will work. Comes in at $225.
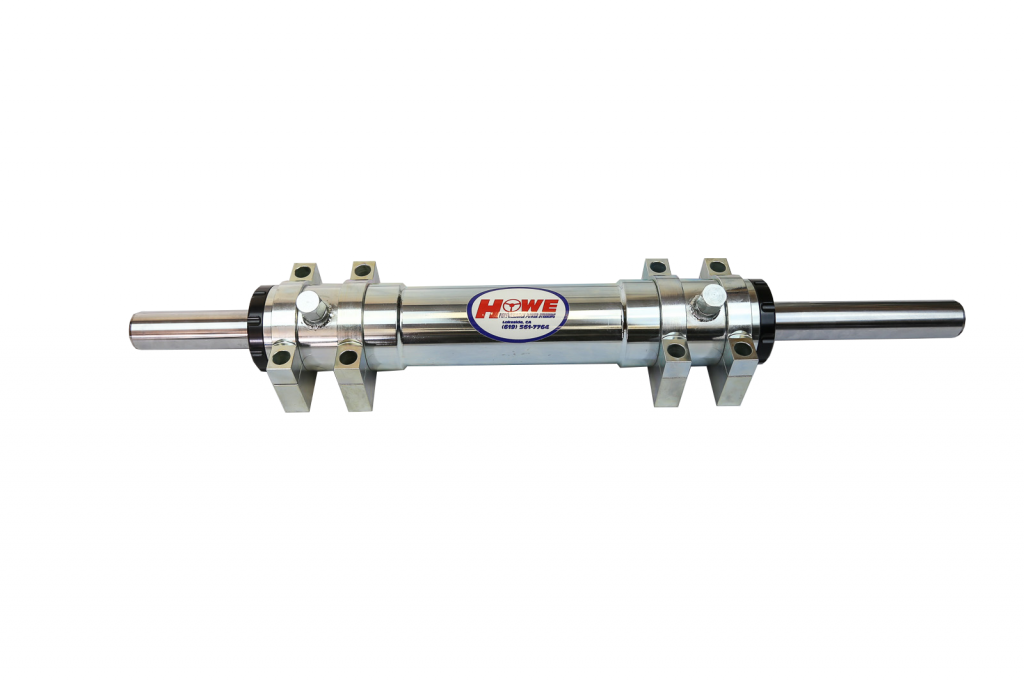
>Howe Racing-Highly regarded performance/quality, not highly regarded customer service. Looks blingy as hell, costs ~$800.
>PSC ram-Well regarded ram, great customer service. Uses a 2 piece piston design and has reports of it becoming unscrewed. Costs: ~$330
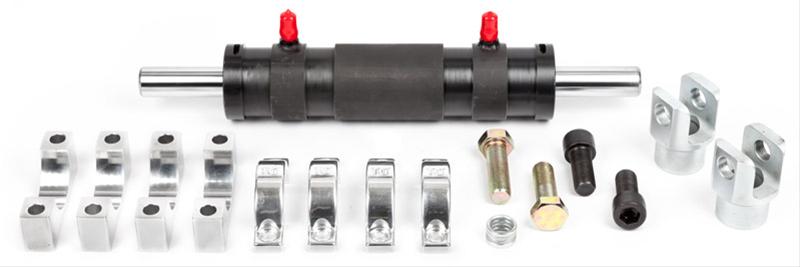
>Trail gear ram: Usually regarded as the budget cookie cutter ram, good customer service. Only ram to publish their internals. One piece chromoly shaft. Costs: $300
The thing that always sticks in my craw after reading through the hydraulics bible is the port sizes on all these rams are AN-6 (3/8”). Most Orbitrols (steering valves) are somewhere in the neighborhood of ¾-16” ports. The KRC pump is an AN-6 on the pressure side and an AN-10 (5/8”) on the return. One of the main tenets of hydraulic system design is to keep your stuff all the same size to avoid cavitation and excess heat. So that gets me wondering if I should try and bore the ram sizes up to AN-8’s (1/2”) and size everything else accordingly. They sell ¾-16 to AN8 plugs for the orbitrol. The pump is still limited to -6 unfortunately.
So it is time to start spec’ing out the system. For a good hydraulic steering system, there are a ton of considerations. There’s a pump (the heart), an Orbitrol valve (the brain), a reservoir (the blood supply), a filter (the kidneys/liver), a cooler (sweat glands?), and all the associated lines and fittings (arteries/veins). Generally it is considered better to have hardline over flexible line whenever possible, and to keep bends and fittings to a minimum as well as size changes.
Here’s the heart of the system. It’s a KRC Pro Series aluminum pump. Supposedly they are the same size and mounting as a standard GM power steering pump and are capable of good flow and pressure numbers through swappable valves and fittings. I went with the largest of both for an output of 1600 PSI and a flow of 3.17 GPM.
The Orbitrol Valve is usually a tricky one. There are a plethora of configurations and options out there. Some are critical, while others are completely unnecessary. We need an Open Center, Load Reactive, and Manual Steering Check valve unit at the very least. We also need to match flow and pressure ratings to the rest of the system. The flow determines how many steering wheel turns it takes to get from lock to lock on the steering wheel. The pressure determines how much force is behind the steering (important for steering feedback and turning large, grippy tires on dry surfaces or in rocks).
Additionally, we can spec in things (usually relief valves) that protect us and the steering system from harm. Other options make our lives easier by doubling or altering steering output under certain conditions. This can give you tame, familiar, predictable steering under normal (and high speed) driving conditions, while giving you the ability to turn the wheels lock to lock in only 45 degrees of steering wheel arc(not even one turn), which can be nice in the rocks and slow stuff. I have picked out an Orbitrol valve (they are spec’ed out with a 30-something digit serial number), but I am waiting to hear back from Eaton on cost/availability. This is what an Orbitrol (sometimes incorrectly referred to as an Orbital) looks like:
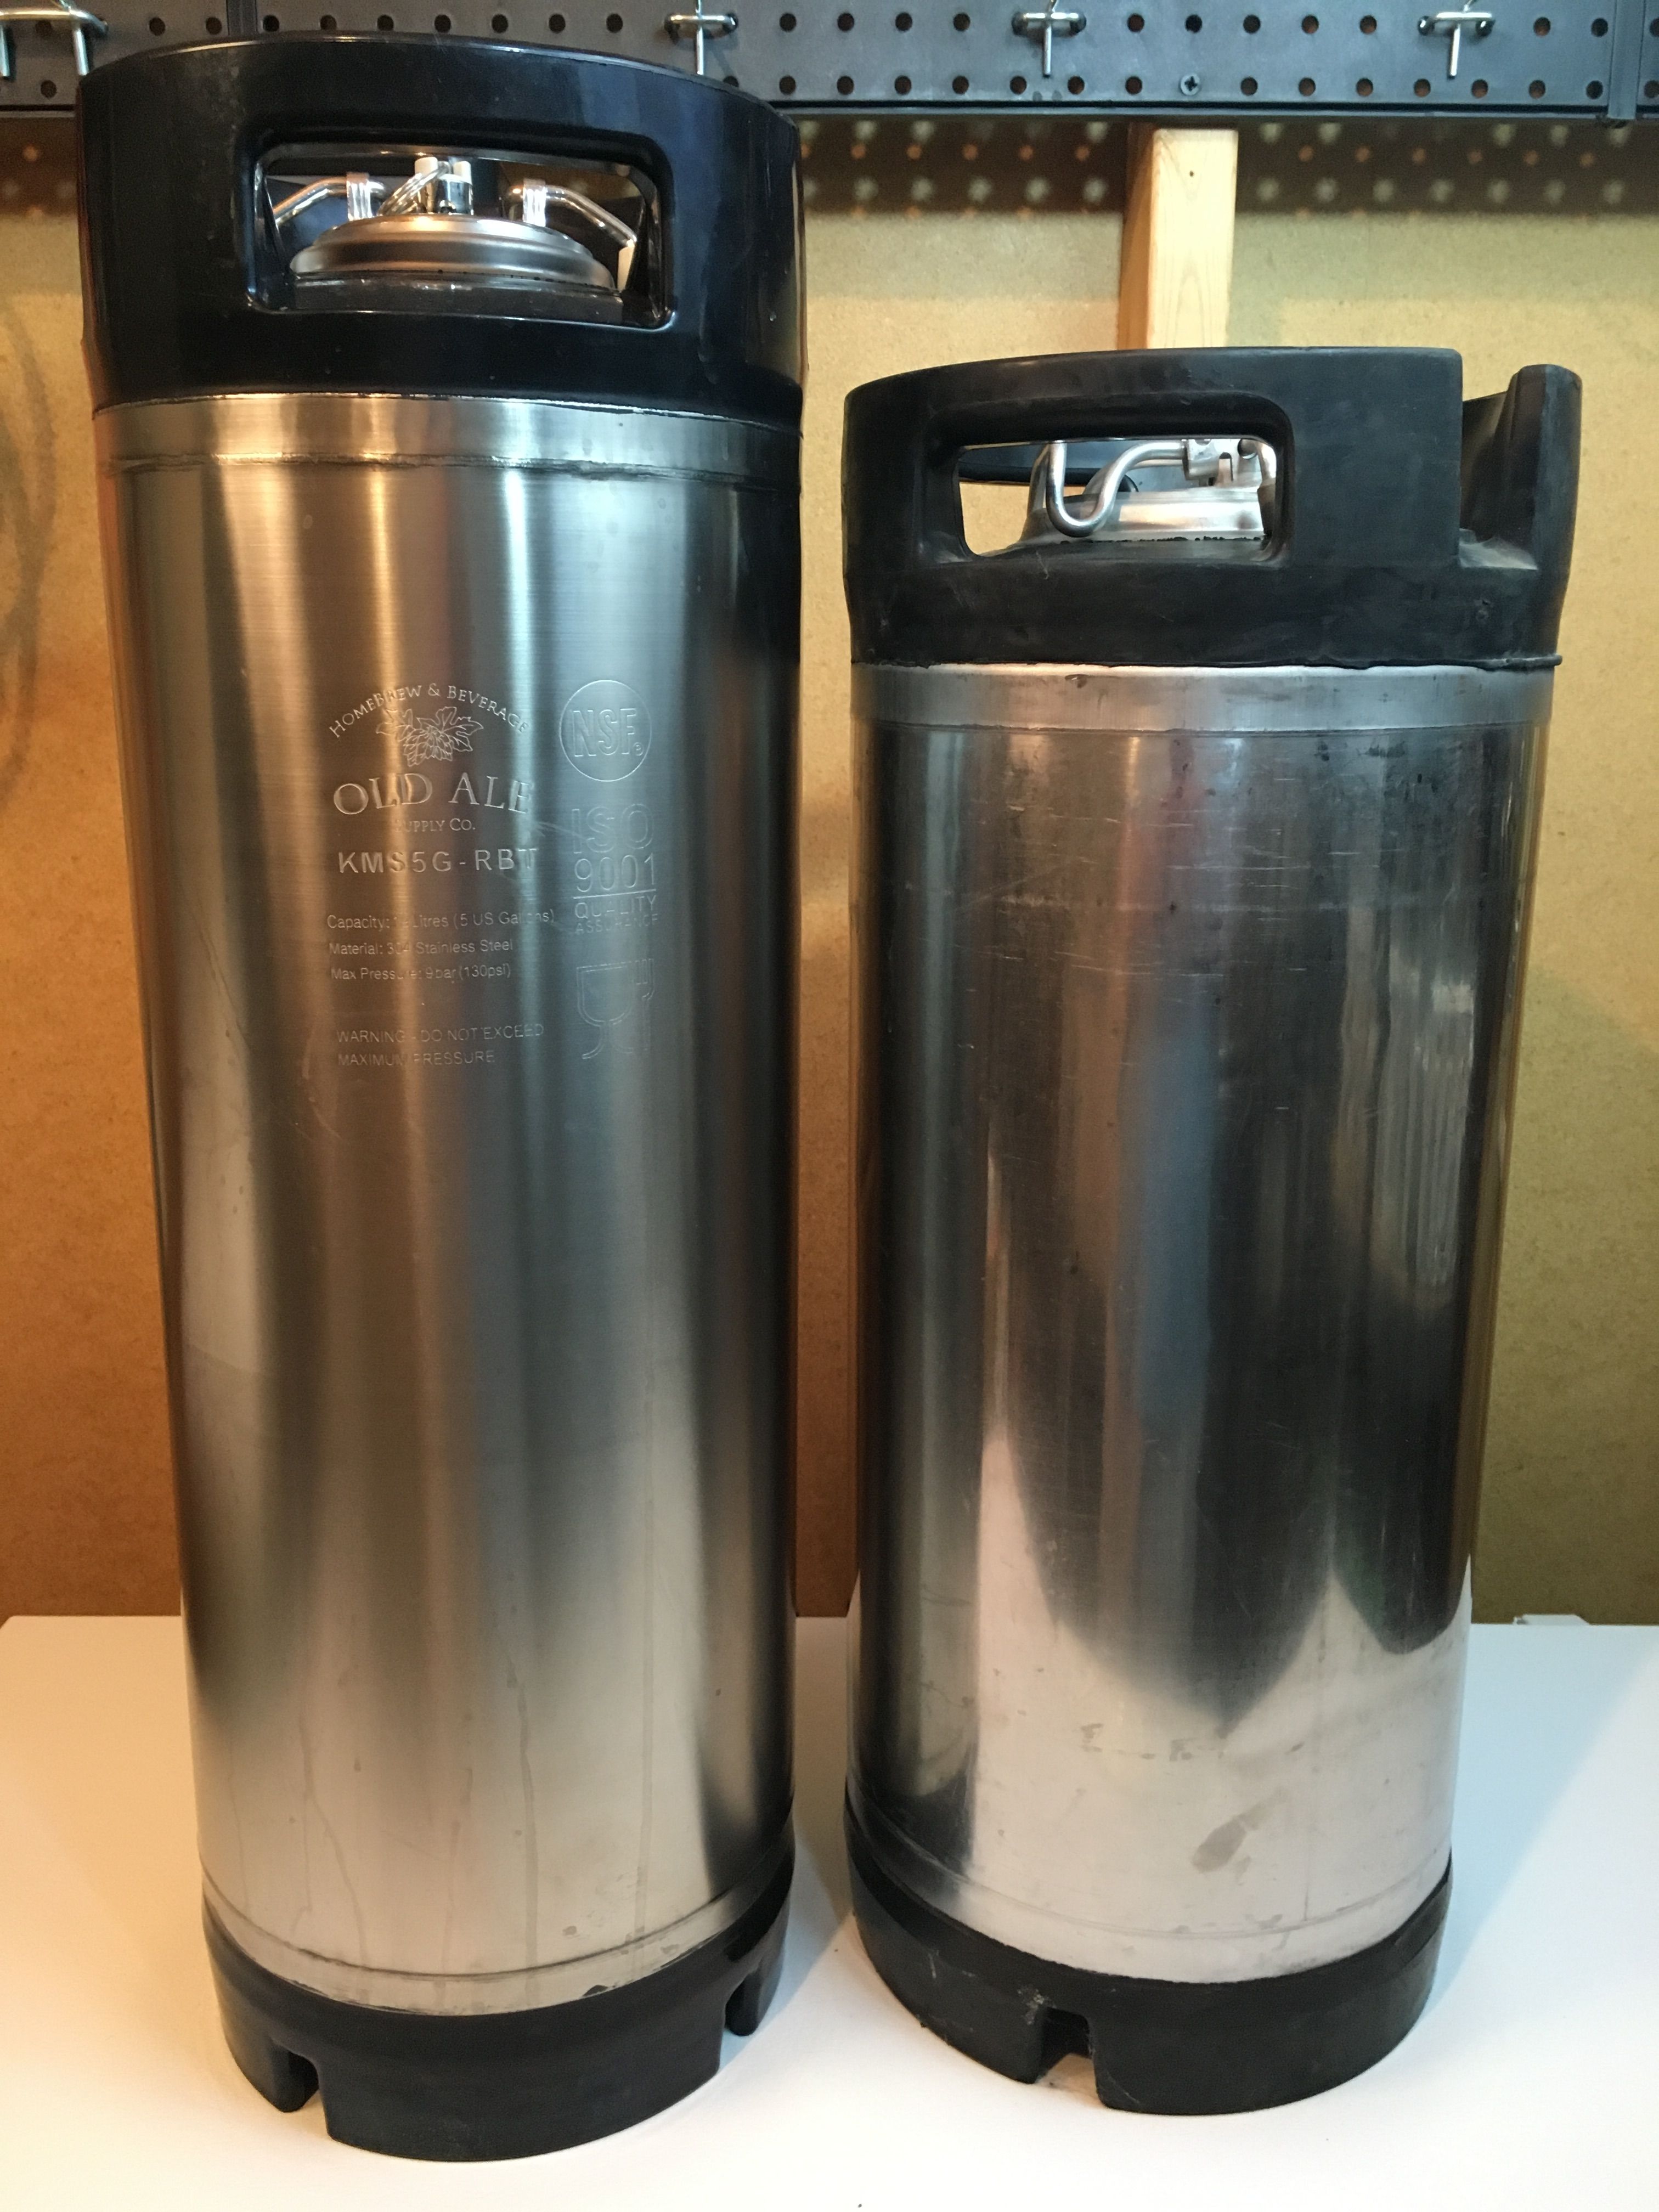
The reservoir is (in my opinion) where most people screw up a hydraulic steering system. A reservoir should be sized at double the flow of the pump. So in my case, over 6 gallons of hydraulic fluid. Think a water cooler bottle, plus a gallon. Most off-road vehicles have reservoir sizes sized in quarts, not gallons, then act surprised when their systems overheat or they are burning out pumps. I brew my own beer and use Cornelius kegs to brew, ferment, store, and dispense my beers. Originally used for soda fountains, the kegs went out of favor in the beverage industry as they switched over to disposable plastic bags inside cardboard boxes to hold the flavored soda syrups. “Corny” kegs hold five gallons, made of stainless steel, have high flow fittings, a depressurization valve, an opening you can get your entire arm into, are cheap and readily available new or used, and finally, are rated for 130 psi working pressure and 300psi ”burst” pressure. Burst pressure is usually actually 3-4 times that, so you have a very safe operating range for the side of the system (return) that is supposed to be working in the single digits of psi. Coupled with other pieces and parts of the steering system (cooler, accumulator), my system should be well into the 6 gallon range. Here’s a Cornelius keg:
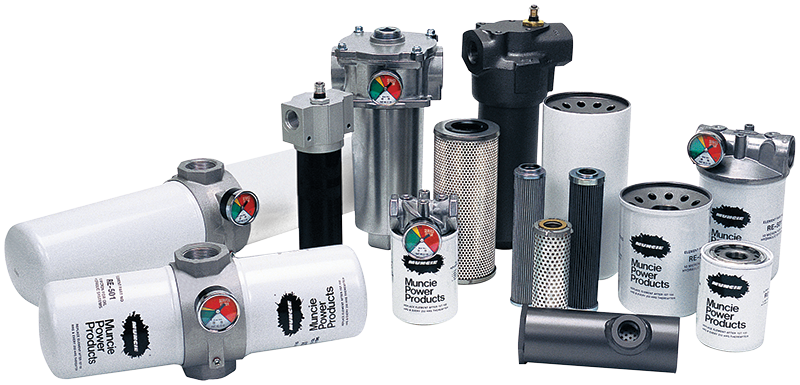
The filter is a bit of a nebulous point in the system. Many off-road systems use a simple screw on automotive style filter. It looks like an oil filter because essentially, that’s what it is. They are relatively cheap, reliable, and can be scaled up just by changing the size of the filter. There are also industrial type systems that use an external screw on filter body and an internal filter cartridge. They are usually sturdier and higher flow, but the filters are not as available/accessible and can be a bit confusing to deal with. I am currently looking into options for the cartridge based industrial versions, but I may end up with a simple spin on.
The cooler can be anything from passive aluminum heat sink fins, to a more recognizable radiator and fan style unit, to a complex shell and tube fluid heat exchanger which uses water to cool the oil. I picked up a couple foot long aluminum heat sink style cooler for a return to the tank. I chose this for several reasons:
>I’m a cheap SOB and it was an impulse buy off the clearance rack at Summit
>it is aluminum and should theoretically have a lower pressure rating (engineered weak point) than the stainless steel reservoir (I would rather have the system have a critical failure outside on the frame rail heading to the tank vs. inside the vehicle)
>It is effectively a length of hardline, but cools the fluid better due to fins and aluminum’s superior heat dissipation properties.
>I will run a conventional style radiator/fan style cooler as well, but am waiting to see where I have space, and how much before I specify it.
Looks like this, but with only a single hole at each end:
In addition to the conventional systems found on a hydraulic steering setup I will be mounting the two Sprague accumulators. One to the high side, the other to the low side. In many systems there is little to no provision for “shock absorption” beyond a relief valve. The problem with this is found when an obstacle (rock, stump, etc.) is encountered, especially at speed. The feedback in the form of a pressure spike typically grenades the system, usually at the pump. Relief valves simply cannot open fast enough or flow enough to compensate. This is one way an accumulator can come into play. By acting as a shock absorber, the air side of the accumulator temporarily gets more compressed. As the spike passes, the air just pushes the excess fluid back into the system at a rate it can manage. On the low side the accumulator can act as a pressurized reservoir to assure fluid is always available to the system, even in the event of an off camber situation, or, in rollover conditions, long enough to turn the vehicle off to avoid system damage.
So, that about sums it up for the steering part of things…… but no, just kidding, it doesn’t. I have an ace up my sleeve. I found a PTO, or power take off system, for the NV4500 transmission. It is mounted up right now on the passenger side PTO port. The plan is to mount a PTO hydraulic pump which is capable of significantly higher output than a bastardized power steering pump (no matter how blingy looking). The idea is to be able to tailor the steering to have the KRC running at high speeds for more conventional style steering and road feel as well as lower wear and tear (and heat) on the system (1600 psi max). In the rocks, at low speeds, we kick on the PTO and the higher pressure, higher flow pump (3000 psi) starts giving us 2-2.5 turns lock to lock and powerful enough ram action (doubled) to knock over boulders while steering with a single finger. A simple check valve set up to put the KRC pump into bypass mode allows the PTO pump to take over. Easy peasy.
So that’s it then, at least for now, for the steering. For real this time.
In my years of absence, I have also grabbed the tube adapters for the suspension links found in the first post on this thread. Next is to get link lengths and weld everything up, then send them all out for heat treating.
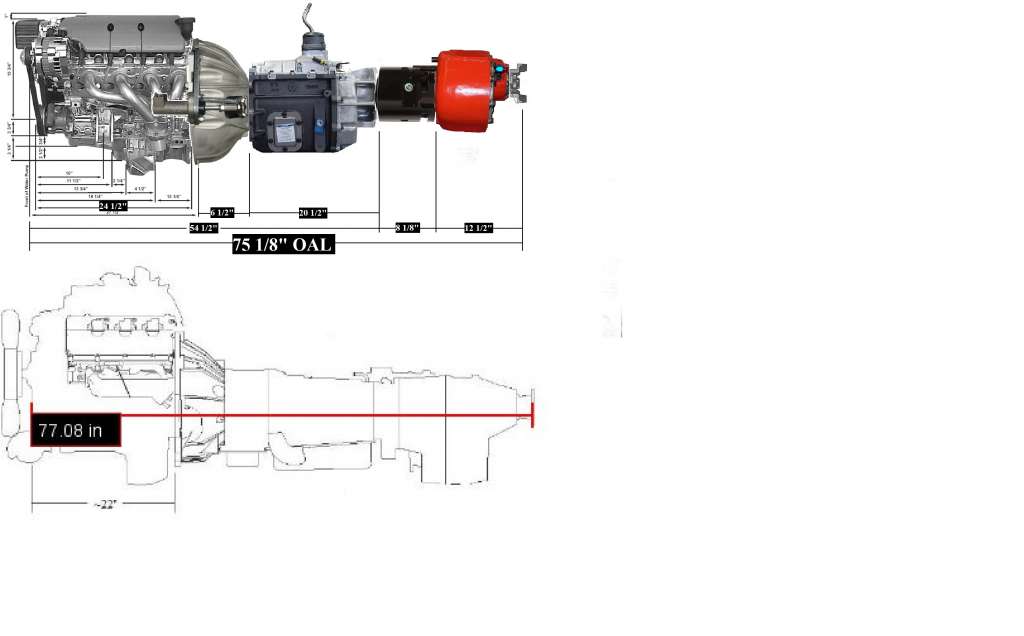
Powertrain wise, I just picked up the guts for the doubler. In the past, I was debating even adding a doubler because Justin (ZEUS) had me scared that the powertrain would be too long and I’d never be able to fit driveshafts. Well, let me tell you. I did the research and math and made these really ****ty refrigerator drawings to prove to him (and you) that I can fit a V8 engine, heavy duty 1 ton truck transmission, doubler, AND transfer case where the original VX stuff lived, plus have an inch and a half to spare! The doubler is going to be a Northwest Fab Eco box with guts from an NP 241 transfer case. It will bring the VX’s low range gearing down to around 100:1. Pretty darn slow. Here's the refrigerator drawing for reference:
Last edited by Ascinder : 12/08/2017 at 10:40 AM
ZEUS (11/11/2017)
 Super VXer
Ascinder (Beau right? We met in Moab one year), it's good to see you back on the forum. I would see your name as I would scan through old threads every-now-and-then and always wondered how you were doing and how your VX build was going, if it was going at all. From the post above it looks like you are back with a vengeance and I can't wait to see how it turns out.
Keep this thread going and keep uploading pictures of the beast.
Mark H.
"The major difference between a thing that might go wrong and a thing that cannot possibly go wrong is that when a thing that cannot possibly go wrong goes wrong, it usually turns out to be impossible to get at or repair."
-Douglas Adams, Mostly Harmless
Super VXer
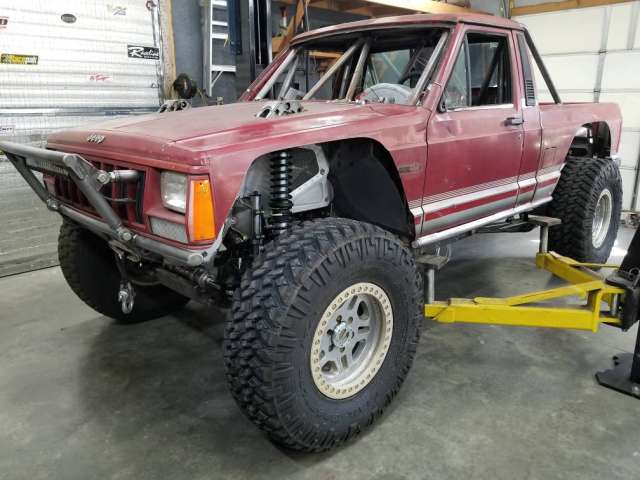
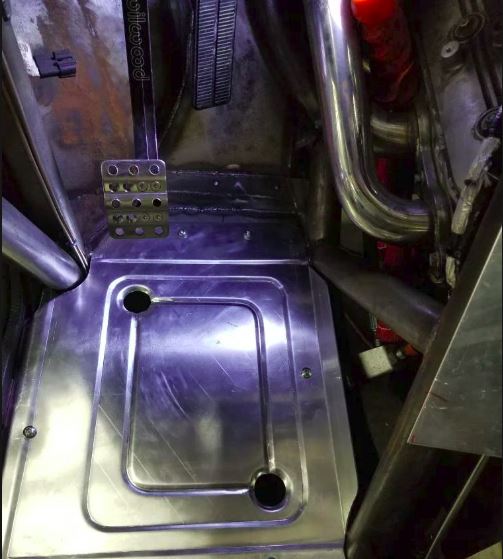
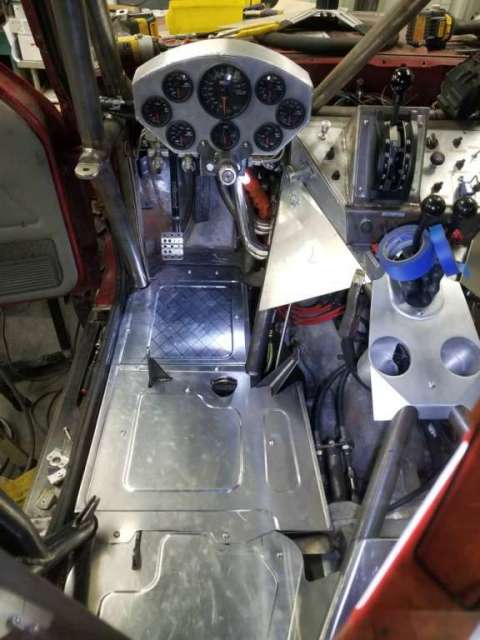
Thanks Mark, I will keep updating this thread as much as possible, but I still won't be home for several months, so right now it's still just the planning and acquiring stages. I am currently working on getting the VX's frame created as a 3D model so I can start playing with positioning the powertrain, suspension links and axles. The more I can get done out here, the less hiccups I think I will run into back home. I am taking inspiration from these two designs, both of which are pushing the engine back into the cab area. I am hoping to move it back just far enough to clear things without ending up like the Comanche(red) truck with his legs pushed into the corner-especially because I have an extra pedal to deal with!
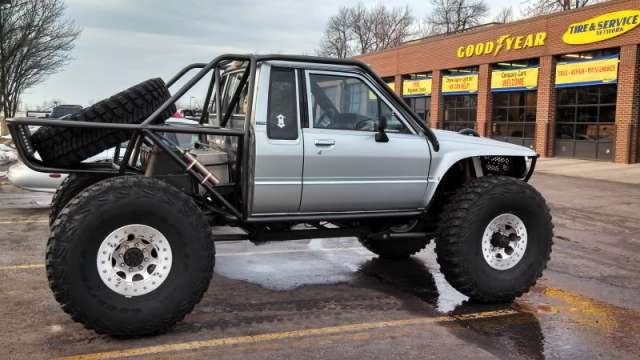
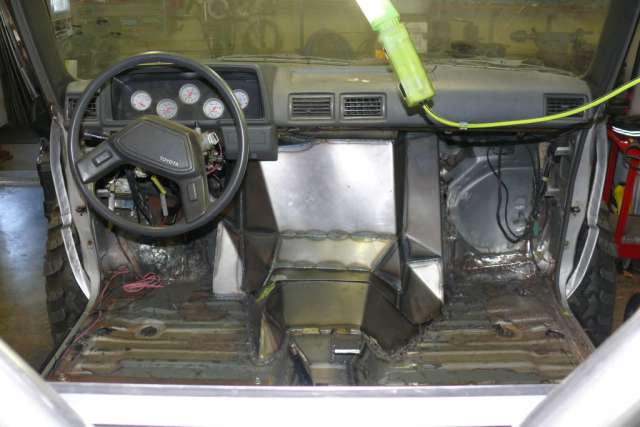
Here's the Toyota. Notice how the lines of an "Amigo bobbed" VX are similar to his rollcage/body....hmmm. It uses a smaller engine and has more clearance than the other truck. I am hoping for something closer to this as far as cab intrusion goes:
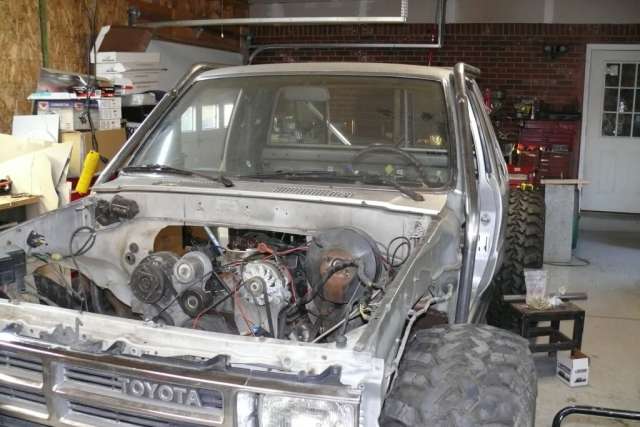
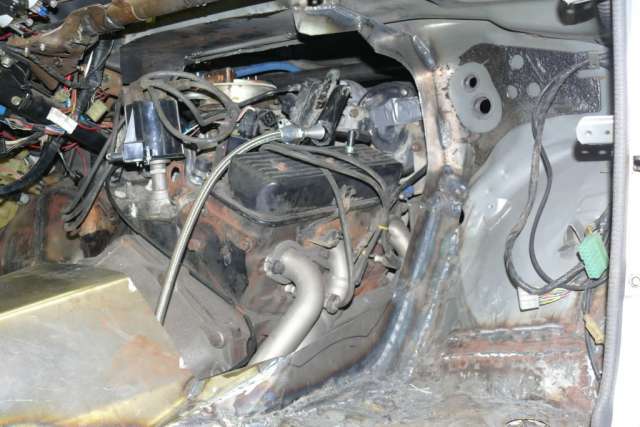
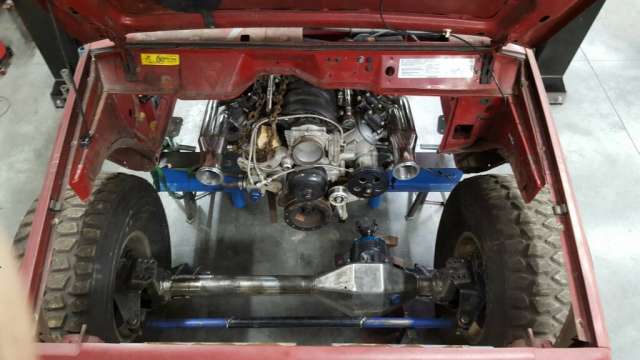
Here's the Comanche, a bit more recent build with a similar engine to what I am using. Notice how much less room the driver has for his legs:
Both of the build threads can be found over on pirate4x4. There are a lot more epics and a lot of good tech for anyone interested. Here are the links to each thread:
Silver Toyota
Red Comanche
Super VXer
Found some pics (old) but show some small amount of progress:
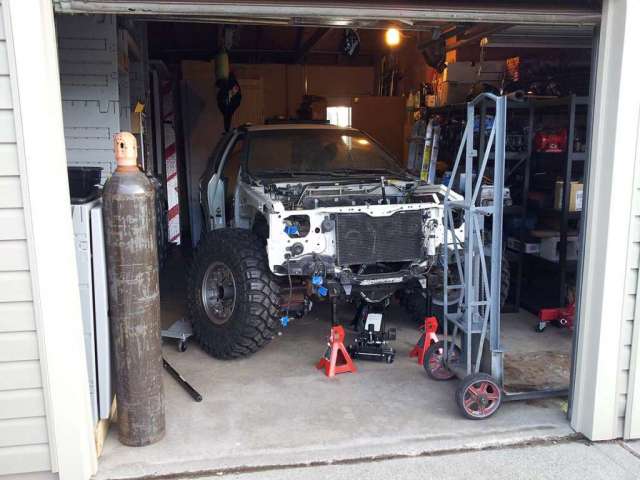
Here it is coming off the trailer after getting moved from the old apartment to the new house:
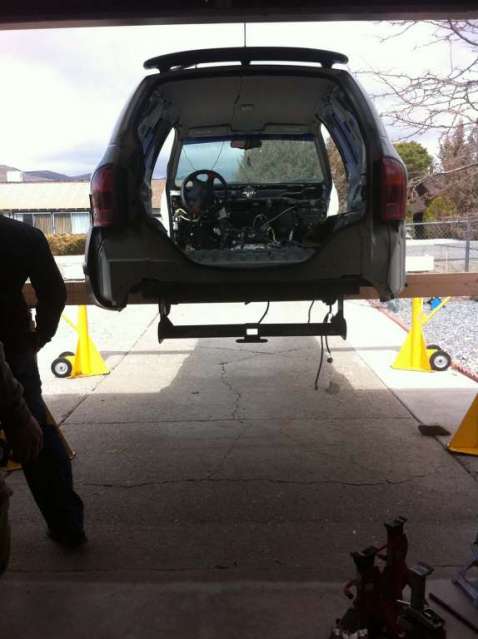
Hover mode from inside the garage:
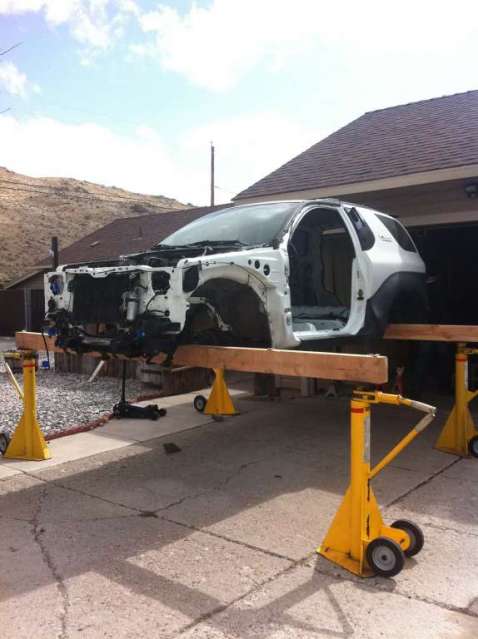
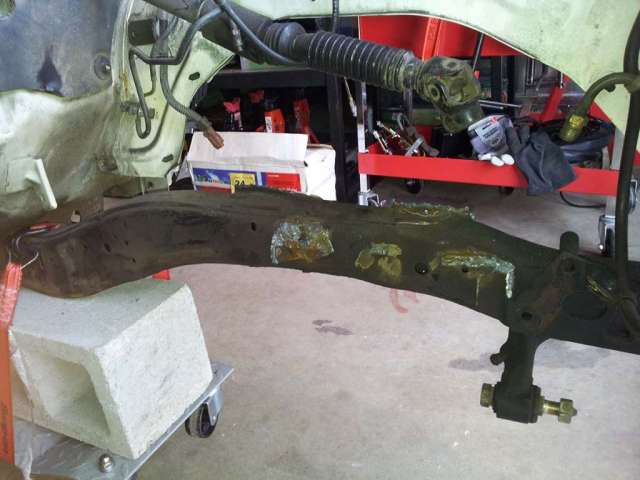
Getting some of the mounting brackets removed from the frame rails. These were a godawful nightmare. If you ever had a doubt about the VX, I can tell you firsthand it is better built than most tanks. Some of these brackets were attached and welded around the frame on all four sides. I have never seen or heard of anything like that. This was an early pic. The frame rails are completely cleaned up now.
Here's a pic of the VX where I mounted the wheels on the D60 and rolled it under. I like the stance and ride height. Stock D60's are capable of around 35 degrees of steering. With the Branik clearanced shafts, they will be able to do 50 degrees. Not sure if I have enough room for that, but we are sure going to try. The D60 has since had the inner C's cut off to make room for the upgraded units.
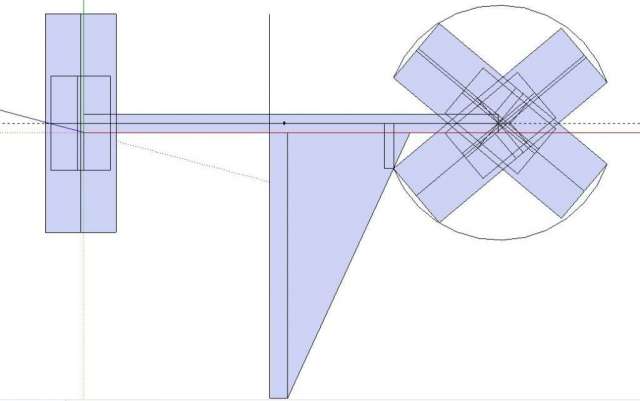
Here's a simple mockup using to scale axle width, proper rim backspacing, tire size and steering angles for 50 degree steering. I was seeing what I could get away with in terms of suspension linkages.
Super VXer
Glad to see you gett'n "back in the saddle" Bro. I have one of thos finn'd aluminium trans cooler in the inventory, just waiting for me to get the Zombie Hunter running again...It's been so long since I ordered it, I just realized that I have NO idea where it is. I'll prolly have to move to get my inventory in order.
Super VXer
I know how you feel. I try and keep all my VX stuff in one corner of the garage, but I think it gets up at night and runs amok. Seems like nothing is ever where I left it. It's hard to get back into the swing of things being stuck over here and not being able to actually "do" anything. I am hoping if I get enough stuff together while I'm over here, the process will hopefully go smoother once I am back. I should have a solid two month block, so once February rolls around, it's time to hit this thing hard. If I can just get over the suspension hurdles, I think it will go pretty easily from there. The suspension is the only thing I haven't been able to visualize (and therefore plan around) because of all of the articulation and travel, and not having a VX in front of me to measure for link placement. I think I may be able to work around that if I can get this 3D model built. I have also been pretty squeamish about cutting into the VX, especially because it is still in such good shape. If I wipe the dust off, the paint still shines like brand new and there isn't a spot of rust to be found on the whole thing. Having seen these build threads and realizing I am working on an (almost) 20 year old vehicle wakes me up to the fact that it is already too far gone to worry about little things like that, so the firewall has a date with the sawzall. Talking to Justin(ZEUS), who is the chicken little/boogeyman of my build, (just kidding, he keeps me honest) he thinks I am going to have transmission tunnel issues. It's a possibility so I am preparing to perform surgery there too.
Super VXer
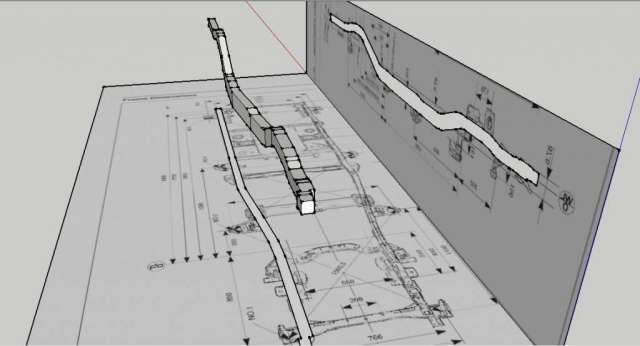
Progress so far on the 3D model of the VX frame. Struggling because this is my first time doing this, but so far so good.
 Super VXer
Looking good
--------
VX Status: Running Great! Build is coming along nicely...
 Posting Permissions


 Reply With Quote