maybe someone bumped it under the thread tools menu


 Super VXer
maybe someone bumped it under the thread tools menu
Super VXer
I did not fall off the planet, my garage will be back to functional this weekend and I look forward to making some real progress. Stand by to stand by.
I am really getting tired of the fast blink turn signals, I am considering wiring the side markers as permanent turn signals to put in series with the LED lights. That way I shouldn't need a resistor, and no more fast blink. I thought about putting the headlight top marker in the circuit as well. That means my turn signals would consist of the side markers, the new turn signals I bought, and the blue halo around the driving lights, and the headlight top markers. I think its gonna look sweet, I will post a video once its all done.
Stay tuned folks.
I predict future happiness for Americans if they can prevent the government from wasting the labors of the people under the pretense of taking care of them.
Thomas Jefferson
 Administrator
Make sure to watch your grounds, but you'll still need either a resistor or an electronic flasher unit. The corner (and or the horn markers) markers won't increase the load enough to make the OEM flasher work properly.Originally Posted by Marlin

Scott / moncha.com
Super VXer
Thanks, I need to check , but I think the turn signal bulb and side marker bulb are the same wattage? Not postive on that. I will figure it out. No worries, I am an electrician by trade
Administrator
I stayed at a Holiday Inn Express... The turn signal bulbs are 1156, the corner and horn bulbs are 194.
The 1156 = 2.10 amps and generally are around 27 watts
The 194 = 0.27 amps and are generally around 5 watts
I tried doing without the inline resistor and short of buying several different E-Flashers for trial and error (Some work, Some don't), I gave in and did the inline resistor anyway. If you do come up with a different solution, please share.
Super VXer

"Do Not Seek Praise. Seek Criticism."
"If You Can't Solve A Problem, It's Because You're Playing By The Rules."
"The Perosn Who Doesn't Make Mistakes Is Unlikely To Make Anything."
-Paul Arden
Super VXer
I had completely forgotten that a similar project was discussed a couple of years ago (it never went anywhere).
http://www.vehicross.info/forums/sho...threadid=10264
Anyway, I wanted to mention that iron pig offroad that is mentioned in that thread is in Fredericksburg, VA where I live. If anyone is still interested in dealing with them, I'm willing to let them use my VX for measurements and fit checks.
Tom
[SIGPIC][/SIGPIC]
Put a smiley after you say that Bub.
Super VXer
Good info, but I was talking about the side marker on the front fender bulb and the actual turn signal bulb. They are pretty close if not the same, I have been at work since 0600 Tuesday, so I have not had a chance to go out and look. Way too hard to look it up on the Sylvania website...
Administrator
The corner light, the front fender side marker, what ever you call it.. it's a 194 bulb.
This may help you along http://www.vehicross.info/modules.ph...ewarticle&id=5 . It's a piece I wrote up when I first changed the corner lights to flashing back in 2005.
Super VXer
I actually used your write up to convert the side markers to turn signals...thanks Scott, it was a good how to.
On to the bumper, there will be some major changes tomorrow, my garage is finally done. I am taking the sheet metal off, as well as cutting off all the supports I welded on. Then I am beefing it up with some 3/8" thick angle iron on top and bottom of the tube. I will post up some pics when complete, as usual. I really need to get this done. No more excuses...I promise.
Super VXer
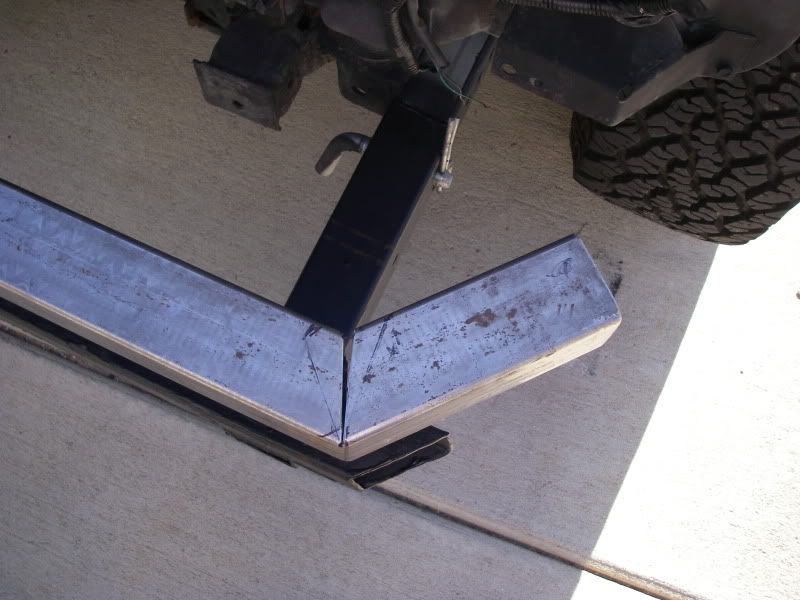
Sorry it took so long, cutting and grinding 3/8" steel is no joke. Took a good two hours to cut and grind those three pieces. Measuring multiple times, steel is expensive, and you can't just sand it down.
So here is where I stand. I am on the 3rd coat of Rustoleum oil based enamel, it paints on almost like an epoxy, my labor intensive alternate to powder coating.
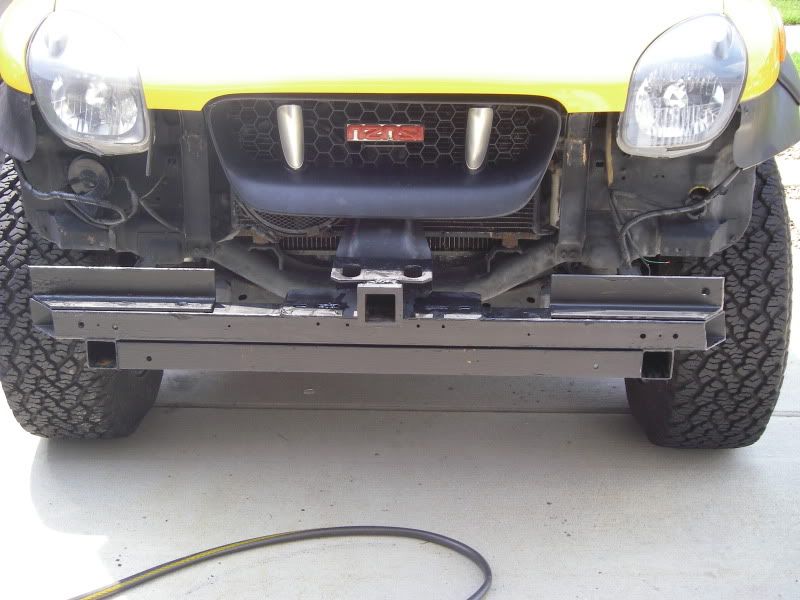
Here are a few pics of my options. I cut the irons on top, they will give me the angle for the front piece. The bottom prevents the tendency for the bumper to fold inward if being winched. The bottom can either be flat, even with the tubing, or I can flip it around and put another angle and wrap the sheet metal all the way under. That is probably the way I will go. Give it a more aerodynamic look, plus I will mount the new skid plate to match that angle, theoretically.
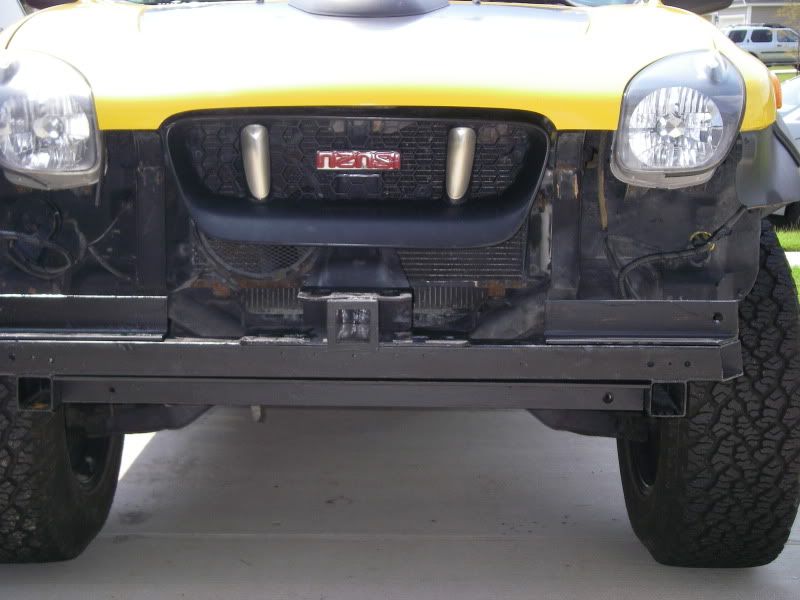
I also included a pic with the new lights, not mounted yet, but that is where they are going. Hmmm, still need to straighten out the grill insert, it is ziptied in place right now.
Enjoy!!
Super VXer
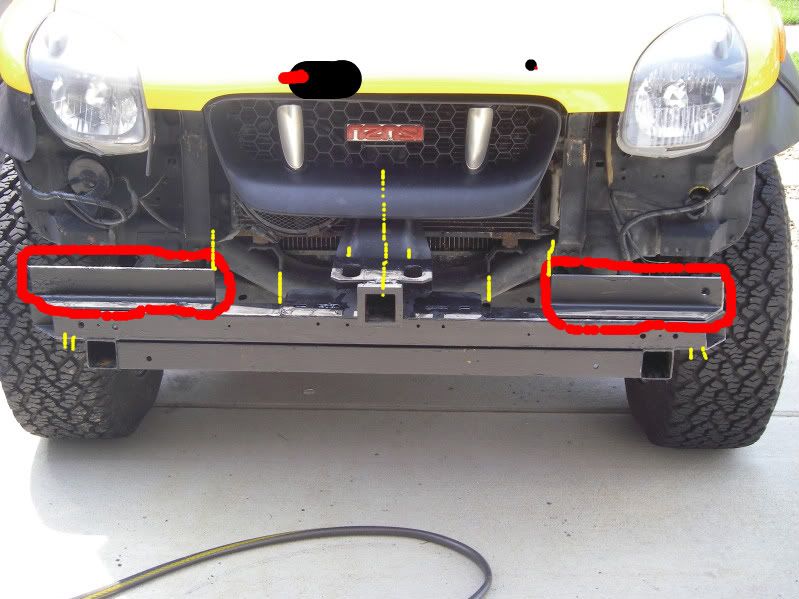
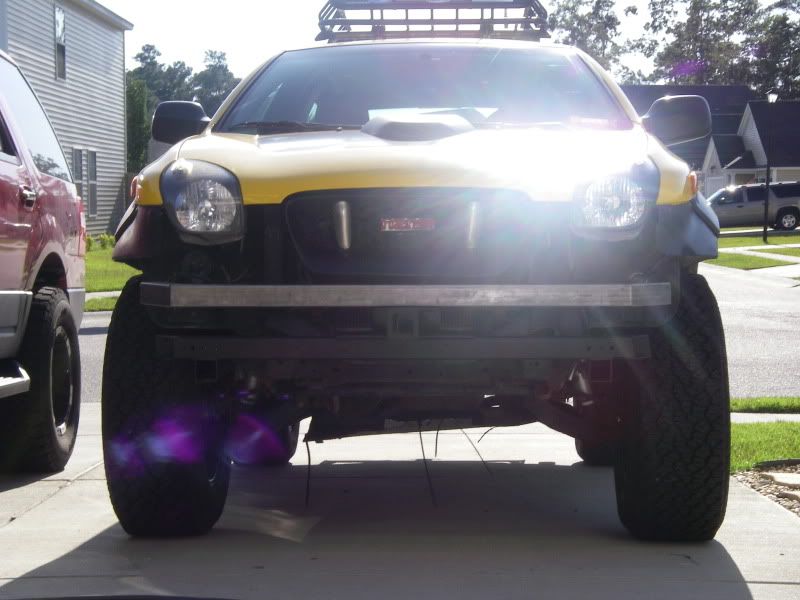
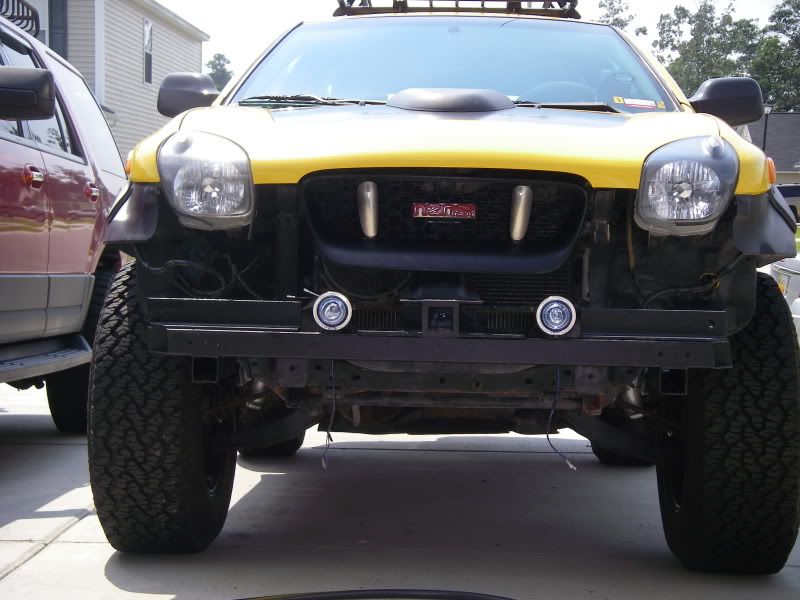
For those of you that are super attentive to detail, the top pieces are different lengths. They are exactly 1" different which is too much coincidence. The center of the vehicle is not really the center with respect to the frame mounts for the bumper. I have no idea, everything else is centered, I marked a few spots to use as a reference, the hitch is dead center as related to the truck, but if you look at the crossbar, it is not centered. My only guess is that the frame itself is not centered by design, or maybe the bumper mounts are not centered. Frame isn't bent, clean Carfax except minor fender bender a few years ago(driver side fender is aftermarket) plus it is EXACTLY 1" difference. Oh well, it looks fine, you would probably not notice unless I pointed it out. Just thought you super fine comb detail people would appreciate it, it does make the engineering a bit harder since each piece has to be different vice making multiples of the same piece. The second pic is a bit more straight on so youcan see how the hitch is centered. The edited pic is not straight on but had a better reference for what I wanted to show.
Last edited by Marlin : 08/30/2009 at 06:08 PM
Super VXer
It's coming along good. Keep up the good work.
Peace.
Tom
"Through Great Sacrifice..... Great Rewards Will Be Achieved"
Super VXer
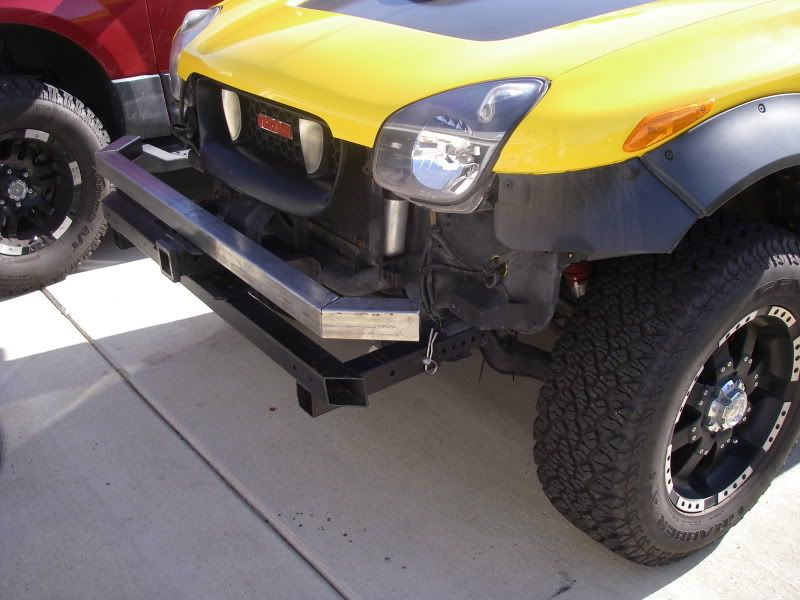
Thanks to the advice that Orion gave me a few days ago...that would have been nice a few months ago, I am making significant progress. Here are a few pics. I will weld this weekend, under the ends of the top cross bar I will weld some 2" angle iron as supports between the two bars right above the frame rail mounts. This top bar solves the problem of making the bumper capable of being stepped on, fills a few more inches of that empty space, and allows me to put the fog lights in between two bars, no fear of stepping on them or whatever.
Sorry the pic is bad, house faces the west...bad afternoon shots. Get over it.
 Super VXer
There you go! nothing more fun than bending metal
 Posting Permissions


 Reply With Quote